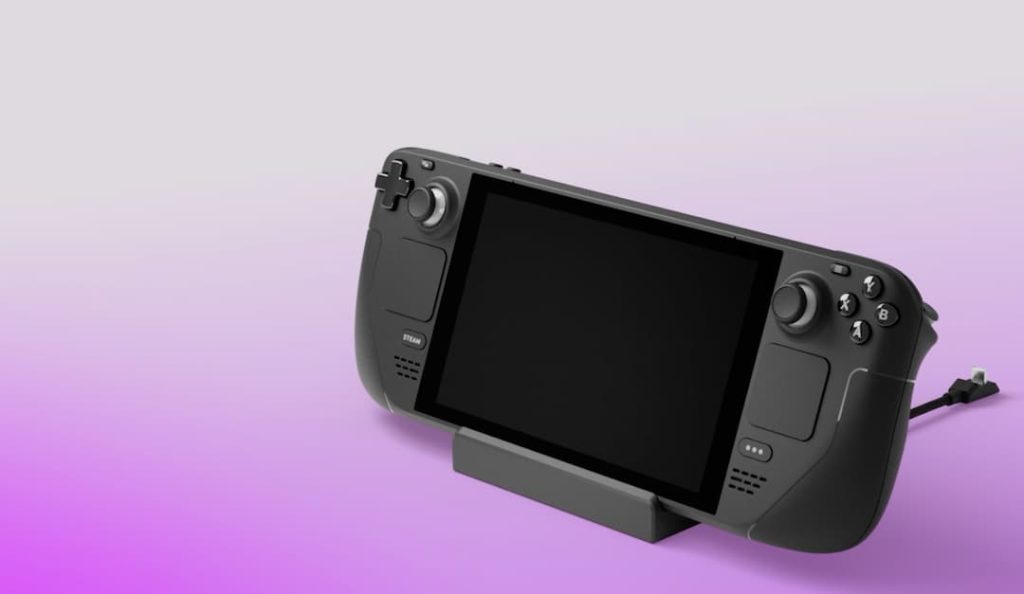
The Steam Deck, a portable gaming device developed by Valve Corporation, is known for its impressive hardware, user-friendly interface, and vast library of games. However, as with any piece of technology, users may occasionally encounter issues. One common problem Steam Deck owners face is the device not connecting to an external monitor. In this article, we will explore several troubleshooting techniques to help you resolve this issue and get back to enjoying your favorite games on a larger screen.

Resolving Steam Deck Connectivity Issues with Monitors
The Steam Deck is equipped with a USB-C port, enabling users to connect it to a monitor for an enhanced gaming experience. To establish this connection, you will require a USB-C hub featuring an HDMI port. Begin by connecting the HDMI cable between the HDMI port on your television or monitor and the HDMI port on the USB-C adapter. Subsequently, attach the USB-C adapter to the Steam Deck. This configuration should successfully display the Steam Deck’s content on your monitor. However, some users may encounter difficulties in achieving this connection. The following troubleshooting steps will guide you through resolving these issues.
1. Restarting the Steam Deck
Occasionally, software-related issues in electronic devices can be resolved through a straightforward reboot, and the Steam Deck is no exception. To restart your Steam Deck, press and hold the power button for 10 seconds, prompting the device to reboot.
Alternatively, you can navigate to Steam > Power > Restart to execute the same action via your Deck.
Once the restart is finished, attempt to use the monitor with the Steam Deck again. If the issue persists, proceed to the next solution.
2. Replace the HDMI Cable
The current HDMI cable utilized for connecting your monitor to the System Deck may be incompatible with either the Steam Deck or your monitor. It is recommended to obtain an alternative cable and determine if this resolves the issue. A suitable HDMI cable can be located at a nearby electronics store, and occasionally, one may be available at a discounted price. Regrettably, an official HDMI cable specifically designed for the Steam Deck has not yet been released. Consequently, it may be necessary to experiment with various cables to identify a compatible option.
Should substituting the cable fail to rectify the issue, please proceed to the subsequent solution.
3. Updating the Steam Deck
If you have an older version of the Steam operating system, it may contain some bugs that could cause your monitor to be incompatible with the Steam Deck device. To attempt to resolve this issue, you should update your Steam Deck to the most recent version.
Follow these steps to update your Steam Deck:
- Press the Steam button on your Steam Deck.
- Navigate to Settings.
- Choose System.
- Beside the software update, there will be an option to check for updates. Click on it, and if there are any pending updates, they will be displayed here.
- If there are no pending updates, the system will show that it is up to date.
- If there is a pending update, install it and restart the device.
After the system restarts, try using the monitor with your Steam Deck again. If it still doesn’t work, proceed to the next suggested solution.
4. Replace the USB-C adapter
If your monitor and Steam Deck are still having compatibility issues after checking the cable, the problem might be with the USB-C hub you’re using with your Deck. If the hub is not from a reputable brand, it might not provide enough power for your monitor. Consider trying a USB-C hub or dock from a well-known brand to see if that resolves the issue. You can find alternative USB-C adapters at your local electronics store, and you might even find one at a discounted price.
If replacing the adapter doesn’t fix the problem with your monitor, move on to the next solution.
5. Monitor settings
Check your monitor’s input settings and make sure it’s set to the correct input source (e.g., HDMI, DisplayPort, or USB-C). Consult your monitor’s user manual for instructions on how to change input settings. If adjusting the monitor settings does not resolve the issue, then proceed to the next solution.
6. Factory Reset Steam Deck
- Turn off your Steam Deck by holding down the power button for a few seconds.
- Once the Steam Deck is off, press and hold the ‘Volume Up’ button.
- While still holding the ‘Volume Up’ button, press and hold the power button until the Steam logo appears.
- Release both buttons and wait for the Steam Deck to boot into recovery mode.
- Once in recovery mode, select ‘Reset this Steam Deck’ and follow the on-screen prompts to confirm the reset.
- Wait for the reset process to complete, and your Steam Deck will be restored to its default settings.
Note that this will erase all data on the Steam Deck, including games, files, and settings, so be sure to backup any important data before proceeding.
7. Get in touch with customer support
If you’ve tried all the solutions listed above and none of them have worked for you, it’s time to reach out to Steam Deck’s customer support. You have the option to contact them via email, phone, or Twitter to report your issue, and they will provide you with a resolution. However, calling them is recommended for a prompt response.
Keep in mind that if your Steam Deck has a hardware defect, the only way to get it fixed is by contacting customer support.
| Support | Contact Information |
|---|---|
| Steam Support | https://help.steampowered.com/ |
| Email Support | [email protected] |
| Phone Support | +1 (425) 889-9642 |
| @Steam_Support | |
| Community | https://steamcommunity.com/discussions/forum/1/ |
Note: This information may be subject to change over time. It’s always best to check the official Steam website for the most up-to-date support options.
So, this is all about resolving the issue of Steam Deck not connecting to a monitor. If you have any questions or concerns regarding this topic, please leave a comment below, and we will respond to you as soon as possible.


