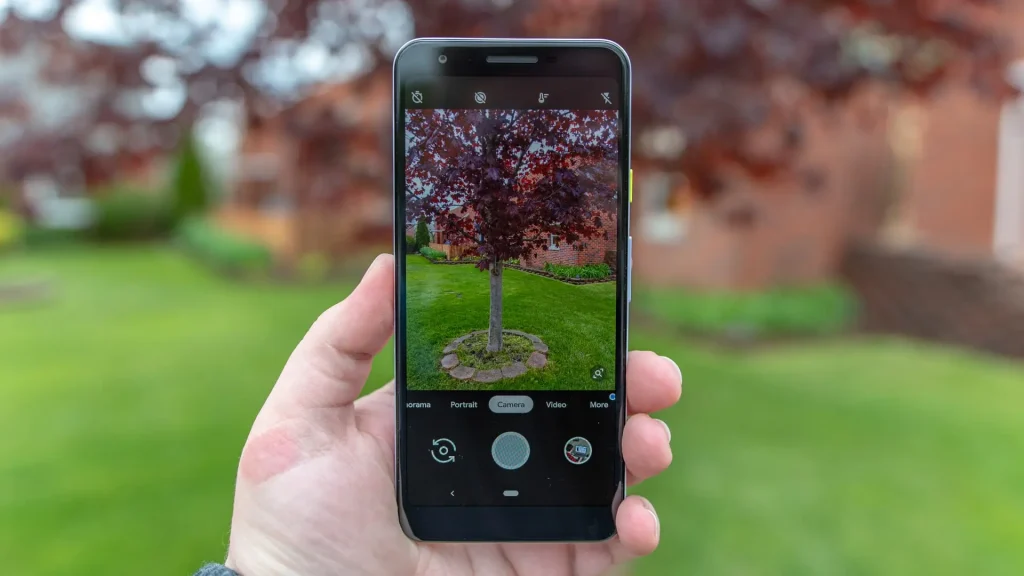
If you want to take better photos on your Android phone, the GCam Nikita port might be exactly what you need. This article will show you where to download the most stable, compatible version of GCam Nikita, how to install it, whether Camera2 API is necessary, and how to use configuration (XML) files. By the end, you’ll understand why this port often gives much better low-light performance and enhanced image processing compared to your phone’s stock camera app.

What is GCam Nikita?
GCam Nikita is a modified version of Google’s Camera (GCam) app, ported by the developer “Nikita” (nickpl13) and community collaborators. It brings many of Google Camera’s advanced features, HDR+, Night Sight, Astrophotography, improved dynamic range, better noise reduction, to Android phones that do not ship with GCam. Because it is customized for many devices through configuration files, it tends to be more stable and better performing than generic camera ports on many phones.
Why Choose GCam Nikita? (Benefits)
Here are some of the main benefits of using GCam Nikita instead of the stock camera app:
- Improved Low-Light Performance: Night Sight and multi-frame processing make shots in dim lighting clearer and with less noise.
- Enhanced HDR & Dynamic Range: Captures details in the shadows and highlights, avoiding blown out skies or pitch-black shadows.
- Better Color Accuracy and Natural Tone: Often more true-to-life colors vs stock apps which may over-saturate.
- Astrophotography & Long Exposure: If supported on your device, astrophotography mode helps you take photos of the night sky with detail.
- Advanced Features: RAW/RAW+ support, portrait mode with better edge detection, sometimes slow-motion / time lapse improvements.
- Customization via XML Configs: You can load device-specific settings which optimize GCam Nikita for your phone’s sensor, ISP, etc.
Most Stable & Compatible Versions of GCam Nikita
Here are versions which are considered stable and widely compatible:
| Version | Android Requirement | Main Features / Notes | Compatability Highlights |
|---|---|---|---|
| NGCam_8.2.300-v1.8 (Nikita) | Android 10+ | Latest in 8.2 series, many optimizations, good set of fixes & configs. | Many users report good stability on Snapdragon / mid-range phones using this version. |
| NGCam_8.4.300.414775575.18 | Android 10+ | Newer build, includes minor bug fixes, more recent updates. | Good option if 8.2 version has issues on your device; newer may support newer Android versions. |
| NGCam_7.4.104-v2.0 (Nikita) | Android 9 / 10 etc. | Older stable build, broad config support. | If newer Nikita builds crash or unstable, many users fallback to this version. |
Download Link for GCam Nikita APK
Here are the trusted places to download the GCam Nikita port:
- CelsoAzevedo GCam Hub — has multiple Nikita versions (for example, NGCam_8.2.300-v1.8, earlier builds, configs) listed. (Celso Azevedo)
- APKPure — provides Nikita GCam 8.4.300.414775575.18 APK. (APKPure.com)
Make sure to download from a trusted source to avoid tampered apps.
Does GCam Nikita Require Camera2 API?
- Yes, it is required (or strongly highly recommended). GCam Nikita uses features that need Camera2 API (especially the full or “level 3” implementation) for advanced modes like Night Sight, RAW etc. Without it, some features either won’t work or the app might crash. From CelsoAzevedo’s troubleshooting, one common reason for crashes is “the camera2 API is disabled on your phone.”
- Some users on Reddit also mention that low-end devices or phones where camera2 is disabled by vendor cannot use full GCam features.
How to Enable Camera2 API (If Not Enabled Already)
If your device supports it but it’s disabled, you may be able to enable camera2 API with root or via some patches. Here’s a basic method (root required in many cases):
- Obtain root access on your phone (if not already).
- Use a root file editor or via custom recovery / Magisk module / build-prop editor.
- Add or modify the line in /system/build.prop (or vendor build.prop) or similar:
persist.camera.HAL3.enabled=1Sometimes also:camera.HAL3.enabled=1or other vendor-specific HAL properties depending on phone. - Save, set correct permissions, reboot the phone.
- Use an app like Camera2 Probe to verify that “Full” or “Level 3” camera2 support is present.
If you do not have root, it might be impossible to enable, depending on your phone’s firmware. In that case, look for GCam ports or lighter alternatives that can work with limited camera2 API support.
Comparison Table: GCam Nikita vs Stock Camera App
Here’s a detailed comparison to help you see what improvements GCam Nikita offers over the stock camera:
| Feature | Stock Camera | GCam Nikita Port |
|---|---|---|
| Dynamic Range / HDR | Basic HDR or auto-HDR (if present), sometimes blown highlights/shadows | Strong HDR+; better retention of details in very bright and very dark areas |
| Low-Light / Night Shots | Typically noisy, less detail, less light gathering | Night Sight / long exposures; lower noise; more light in dark scenes |
| Astrophotography / Long Exposure | Usually none or limited (vendor-specific, some phones) | Available in versions; allows capturing stars / night sky with decent clarity |
| Portrait / Edge Detection | Decent bokeh or blur; often oversmoothing; weaker subject background separation | Better edge detection; more natural blur; more consistent backgrounds |
| Color Accuracy | Sometimes oversaturated or too flat, depending on OEM tuning | More natural colors; better color tone in mixed lighting; improved white balance in many cases |
| Detail & Sharpness | Depending on hardware & ISP; sometimes over-sharpened or muddy in low light | Better detail especially in moderate-light; improved sharpness without heavy artifacting |
| RAW / DNG Capture | Often no RAW or partial support; limited control | Many Nikita builds support RAW; useful for editing afterwards |
| Performance / Stability | Well-integrated with OS; optimized for device; less crash risk | Depends on build, configuration; sometimes unstable if wrong version or no camera2 support; but with proper version + XML config, quite stable |
| Additional Features | Vendor features: wide-angle, telephoto, etc., depending on phone; company UI etc. | Extra modes (astrophotography, motion photos etc.), custom settings via XML, sometimes better zoom, etc. |
How to Install GCam Nikita Port: Step-by-Step Guide
Here’s how to install GCam Nikita safely on most Android smartphones.
- Check Android version & SoC compatibility
Make sure your phone runs Android 9, 10, 11 or newer (depending on the version you want to install). Snapdragon devices often have better support, but many other chipsets also work if camera2 API is present. - Ensure Camera2 API is enabled
Use an app like Camera2 Probe to check. If needed, enable via root or custom build-prop or vendor patches. (See earlier section.) - Download the correct APK
Go to trusted sites (CelsoAzevedo, APKPure). For example, NGCam_8.2.300-v1.8 or version 8.4.300.414775575.18 if your device handles it well. Save the APK to your device. - Allow installation from unknown sources
In Android settings → Security (or Apps & Permissions) → “Install unknown apps” for your file manager or browser. - Install the APK
Open the APK; follow the prompts to install. - Grant required permissions
On first launch, allow camera, storage, microphone etc. - Load a Config / XML File (Optional but highly recommended)
- Download a config (XML) that matches your device (from CelsoAzevedo’s “Configs-Nikita-05”, XDA threads, or “Config Files for Nikita’s NGCam 7.4.104 v2.0” etc.). (Celso Azevedo)
- Create a folder: either
/GCam/Configs/or/GCam/Configs7/or a similar named folder (depending on version). (Celso Azevedo) - Move the XML file into that folder.
- Open GCam Nikita → double-tap on the black area near the shutter (in many builds) or go to its “Advanced → Configs” settings → choose the XML → “Restore” or “Load”.
- Sometimes a restart of GCam app is required for the config to take effect.
- Test & Tweak
Try taking photos in good light, low light, night, etc. If some features are missing or unstable, try a different version or different config. Some features (ultrawide, macro etc.) may still be handled by stock camera depending on hardware.
Tips for Optimizing GCam Nikita
- Use the XML config made specifically for your phone as it tailors settings like exposure, HDR frames, noise reduction.
- Turn off unneeded features initially to test stability (for example, very high HDR frame counts).
- If ultrawide / macro / telephoto lenses do not behave well, check if your version of GCam supports those lenses, or whether stock still works better for those specific lenses.
- Keep the app updated; community sometimes releases fixes.
Final Thoughts
GCam Nikita is one of the most widely used and stable GCam ports out there, especially when paired with a correct version for your Android version and a good config (XML) file. For many phones, it gives significantly better low-light shots, sharper detail, improved dynamic range, and more natural color compared to stock camera apps. If your device supports Camera2 API, installing GCam Nikita can bring noticeable gains.
If you found this helpful, please share this article with your friends on social media so more people can enjoy better photos with GCam Nikita! 📷


![Download Redmi 15 GCam Port [Most Compatible Version] Download Redmi 15 GCam Port [Most Compatible Version]](https://droidfeats.com/wp-content/uploads/2025/08/Redmi-15-450x213.webp)
![Download vivo V50 Lite GCam Port [Most Compatible Version] Download vivo V50 Lite GCam Port [Most Compatible Version]](https://droidfeats.com/wp-content/uploads/2025/08/vivo-V50-Lite-450x249.webp)
