In this guide, I will walk you through the process of patching the stock boot image of your device and rooting it using Magisk Manager. A comprehensive tutorial is provided below, complete with all the necessary files. I strongly recommend reading each paragraph carefully to ensure a successful execution of the steps.
Following Chainfire’s departure from SuperSU and Koush’s move away from CWM and other projects, Magisk has risen as the sole Android root and modification tool that remains active today. Additionally, it’s worth noting that the Xposed Framework currently lacks an official version for Android 9.0 or any later versions.

Unlike other tools, that come and go with fewer features, Magisk comes with several qualities from systemless root to module support. Superuser permission control and installer in Magisk will always keep you up-to-date. If you have heard of Magisk but are not sure what it is or what it is for, here we will see its main functions and how it is installed using Patch boot image.
What is Magisk systemless root?
When we talk about the system modification in Android, the name that appears is the “Magisk.” Just a few years ago, we used to hear more about SuperSU, CWM and Xposed Framework. But in the current scenario, the only active tool is the Magisk.
Magisk is the most superior tool today to modify an Android device.
Magisk gets its name from the combination of Magic and Mask, and its main advantage is that it “hides” its modification in the Android ecosystem.
In this way, a device, despite being modified and rooted, continues to pass integrity tests such as those of SafetyNet, the same test that prevents bank applications or Pokémon Go from working when they detect that the system has been rooted.
There is no magic behind, but almost. Instead of making changes to the system partition, the developer has found methods of making the changes to other partitions. Hence, it is considered the systemless root, or root without touching the system partition. This helps the mobile keep passing integrity tests like SafetyNet.
In addition to allowing you to manage root and superuser permissions, Magisk has modules with a concept similar to that of the Xposed Framework. These modules can be installed from their own manager and allow you to make advanced modifications to the system, from the Viper4Android equalizer to the Xposed Framework (and its modules) or the popular GravityBox.
Magisk consists of one side of its core and on the other of a management application, Magisk Manager. This application is used to configure Magisk, install modules, check superuser permissions, and keep Magisk updated.
How to root Android using Patch Boot Image?
Generally, we root Android by flashing the Magisk using TWRP or any custom recovery. But when things don’t go well, you need to perform a different method; thanks to John Wu for providing alternative ways to install Magisk. This method is also for those devices that don’t have TWRP support but still want to root their devices. Read ahead!
Pre-requisite
- Your Android device must have an Unlocked Bootloader!
- MediaTek users may follow this guide!
- Other users may find some specific guide on our “Unlock section” or else, search the web!
- If you are an enthusiast, you may check out some fastboot commands to get your device unlocked!
- Download the latest version of the Magisk Manager on your phone!
- Install the latest stock ROM on your device if you are still on the older builds.
- Set up ADB Drivers on your computer. (Windows / Mac)
- Make sure your phone has at least 80 – 85% charge. If not, please do charge it before starting the experiment.
- You need to enable the USB Debugging mode to connect your Android phone to the computer. (Settings > About Phone > Build number > Tap it 7 times to become developer; Settings > Developer Options > USB Debugging).
Get the STOCK Boot IMG
You can either get the boot image from Chainfire.mobi or extract the same from the stock ROM package. In the stock ROM ZIP package, you need to find a boot.img file. Extract the firmware and find it out. Once done, you can follow the further tutorial below!
Backup your device
Before starting the tutorial, we suggest you to backup your essential documents from the device and make a copy of it to your computer. On performing our experiment, your device may get wiped, and you may lose everything from the phone. We don’t want that. In that case, we have a list of applications that may help you in creating backups within the phone. Later on, you can copy the files to the computer for a safer side.
- Top 10 Best Android backup apps – Secure your Data!
Once you are sure that you are done with the backup stuff, please proceed to the tutorial below on “How to Patch Stock Boot Image (IMG) using Magisk Manager.”
WARNING: All custom ROMs, Official Firmware, How-to guides, tutorials, roots, hacks, and tricks featured on our site are the intellectual property of their respective developers. We hold no responsibility for any issues that may arise with your device as a result of following these guides. Please proceed with these actions at your own discretion and risk.
HOW-TO: Patch Stock Boot Image (IMG) using Magisk Manager
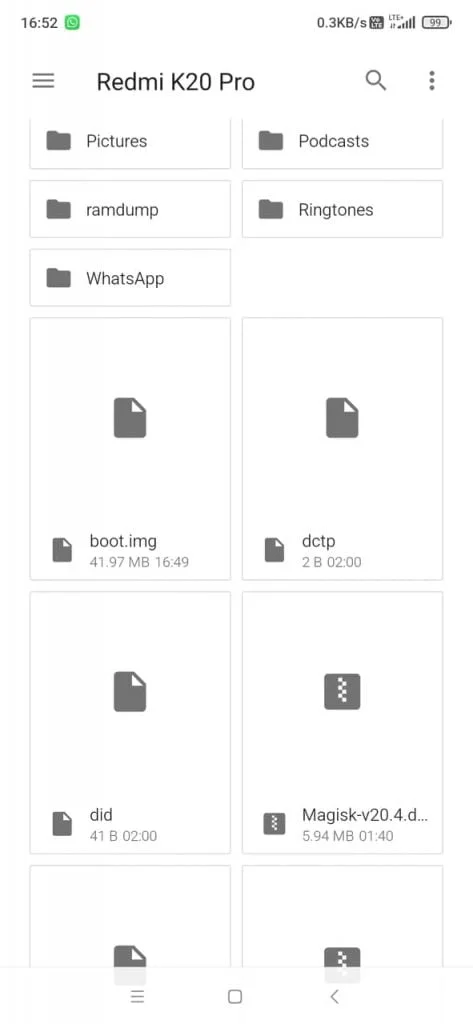
Step 1: Place the boot image on the phone’s internal storage or SD card.
Step 2: Download the Magisk Manager APK file on your phone.
Step 3: Install the APK manually.
Step 4: Open “Magisk Manager” from the app menu.
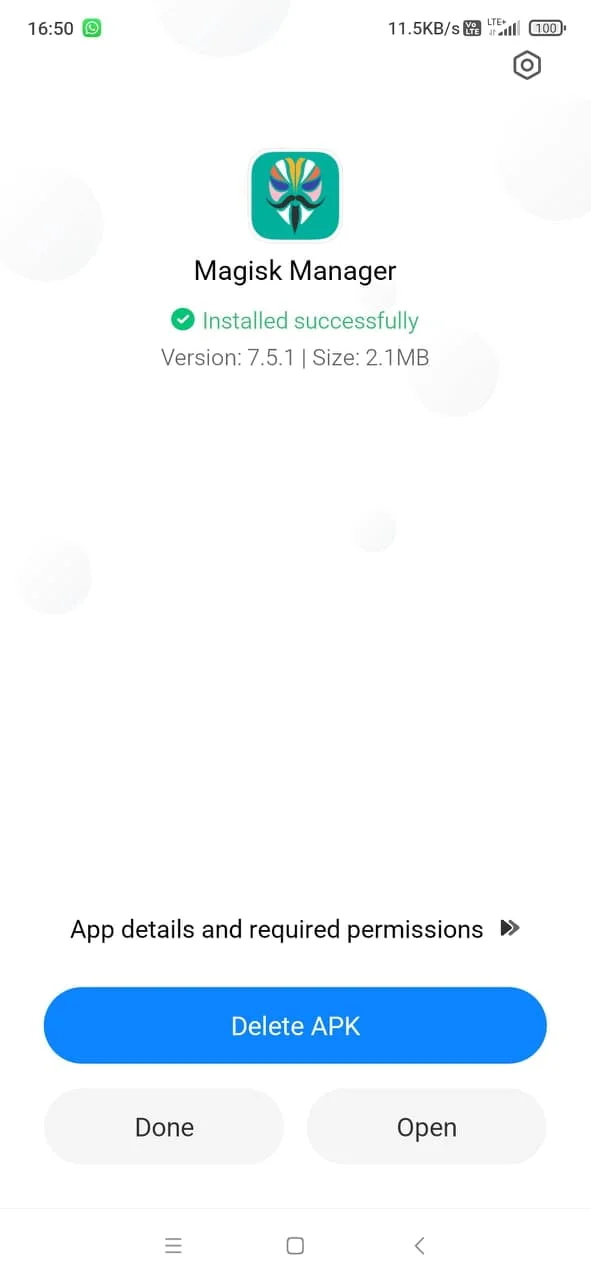
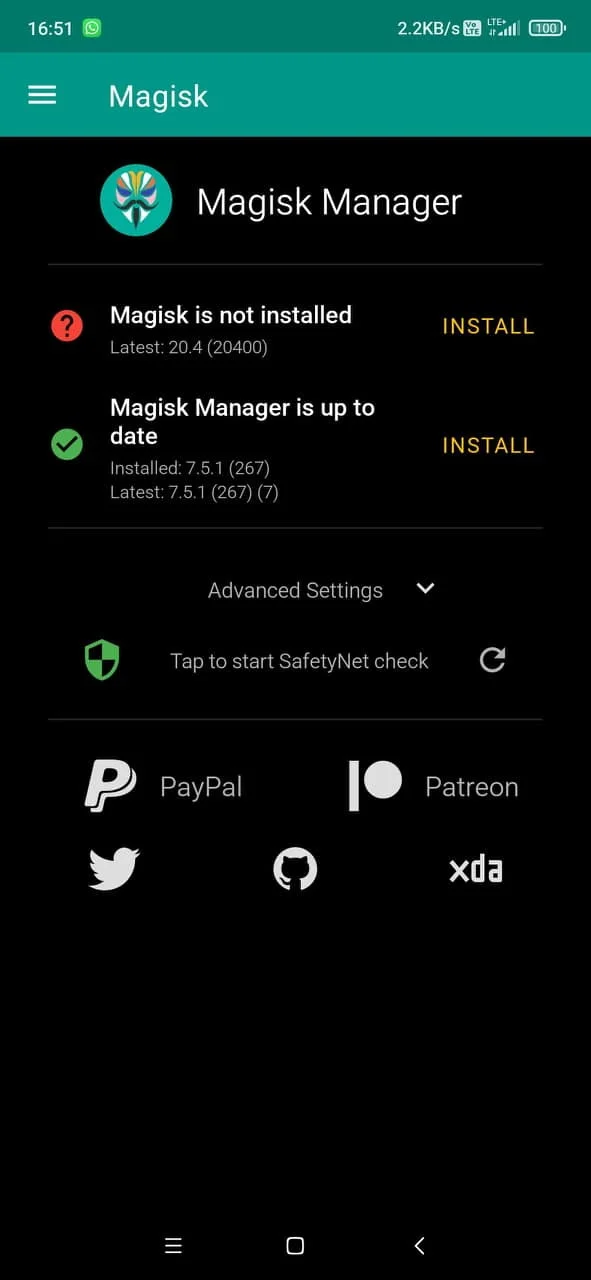
Step 5: Tap on the “Install” button as shown in the screenshot below!
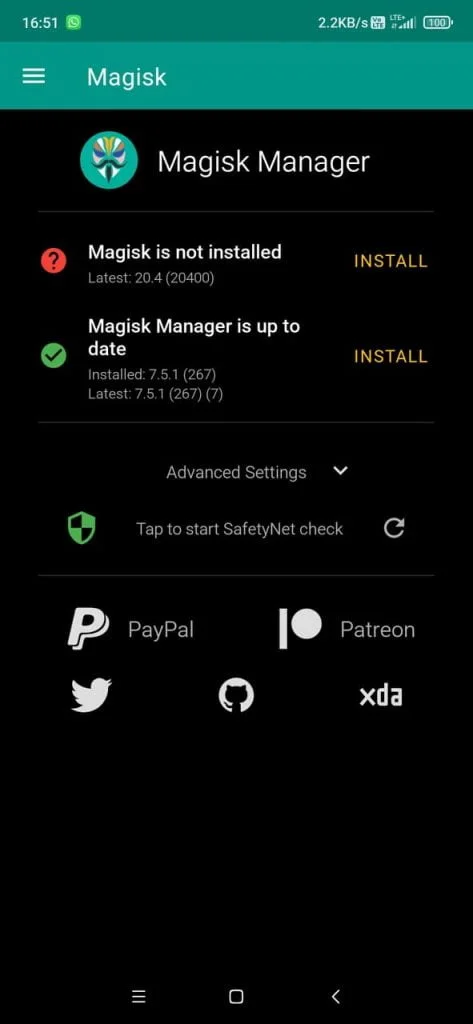
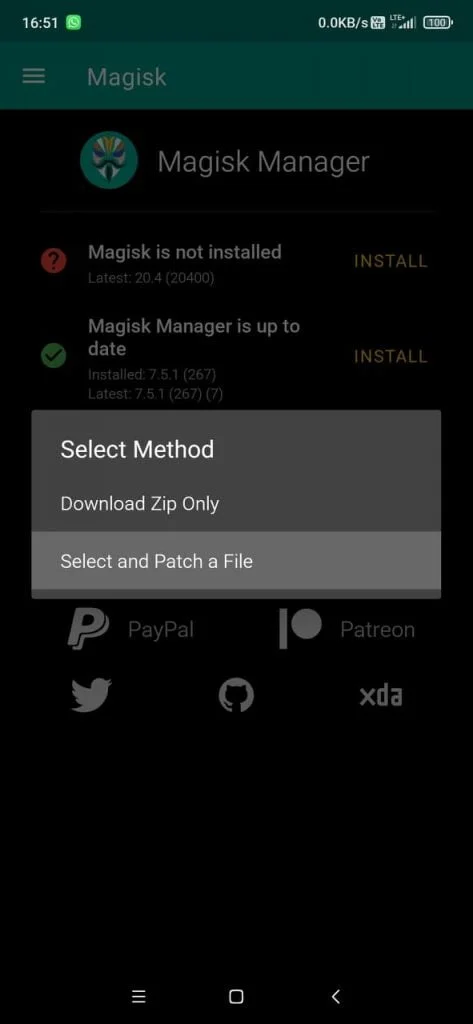
Step 6: Choose “Install” again. Select “Patch Boot Image File”.
Step 7: Navigate to the phone’s storage. Next, select your phone’s boot image that you have already transferred before.
Let Magisk do its job and patch the boot image.
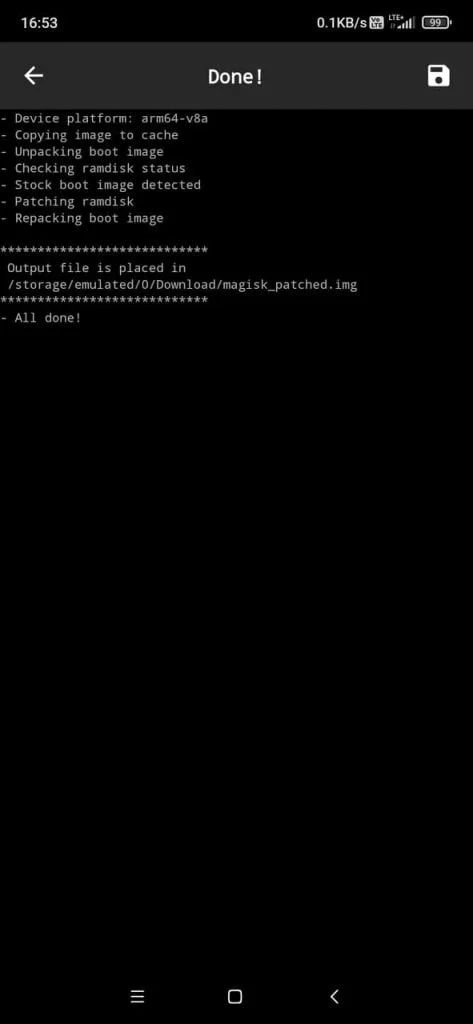
Step 8: After it is patched, copy the “patched_boot.img” file from /sdcard/MagiskManager/ to C:\adb on your PC.
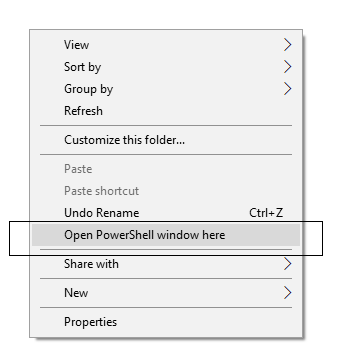
Step 9: Hold the SHIFT key and right-click on an empty space in that same folder. Now, select “Open PowerShell window here.”
Step 10: You need to boot your Android device into Bootloader/Fastboot mode.
Step 11: The phone needs to be connected to the PC.
Step 12: Flash the “patched_boot.img” in order to install Magisk and root your Android device:
fastboot flash boot patched_boot.img
Step 13: Use Fastboot reboot to reboot your Android device:
fastboot reboot
Step 14: Confirm that the installation procedure was successful by opening the Magisk Manager.
You may further check out the Collection of Magisk Modules V2.0 from the official repository (XDA)!


2 Comments
Help
How may I help you? Please explain your problem.