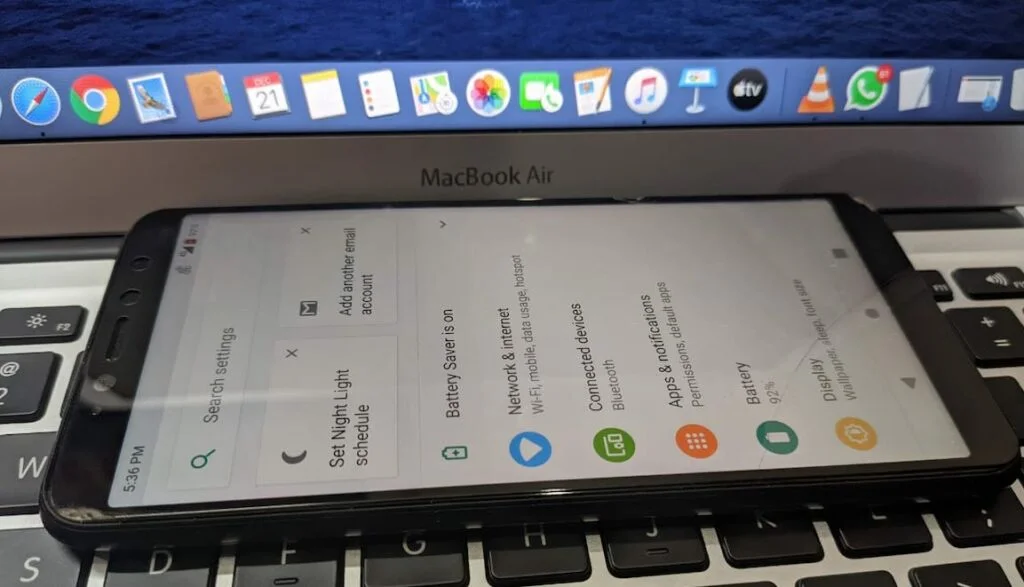
Asus ZenFone Max Pro M1 is one of the most popular mid-range smartphones in India. The phone comes with a 6-inch FHD+ display, 4 or 6GBs of RAM, Qualcomm Snapdragon 636 system-on-chip, stock Android 8.1 Oreo (upgradable to Android 9.0 Pie), and a massive 5,000 mAh battery. One of the biggest drawbacks of a mid-range smartphone is the quality of the camera. You can’t match the picture quality with flagship devices like OnePlus 6, Redmi K20 Pro, or Pixel 2. Fortunately, we have the Google Camera ports.

The Google’s Pixel software with HDR+ and Portrait Mode features have made the Pixel one of the best smartphones for mobile photography in the market. The best part of this camera port is Google’s incredible software algorithms. As compared to the stock camera, the detailing in the GCam port on ZenFone Max Pro M1 is quite great. That’s why the Google Camera is so popular on our Blog. We have a separate section on the GCam hub for various devices.
It’s no surprise that the owner of Max Pro M1 wants a piece of Google Camera port on their device, but unfortunately, installing a port is not that easy as simple as just side-loading an APK. The port requires the phone to support Camera2 API. Even though the Max Pro M1 has that API, it is disabled by default. So, in order to install GCam port on ZenFone Max Pro M1, you need to enable the Camera2 API first.
In this guide, we will show you how to enable Camera2 API and install GCam Port on Max Pro M1. Read ahead, steps with download links are given below!
Pre-requeste
- Make sure your phone has at least 80 – 85% charge. If not, please do charge it before starting the experiment.
- You must install Android SDK tool on your computer.
Must read: Update ZenFone Max Pro M1 to Android 10.0 Stable (via AOSP Custom ROM)
How to Enable Camera2 API on Asus Zenfone Max Pro M1 without Root
You can enable Camera2 API on Zenfone Max Pro M1 without rooting the phone. All you need to have on hand is a computer, ADB files, and some basic commands. The process is simple if you follow the steps carefully. Also, make sure to keep the original USB cable to connect the phone to your PC. Check out the steps below:
- Copy the downloaded image file to C:\adb folder where the ADB/Fastboot binaries are present.
- Turn OFF your Max Pro M1 completely.
- Press and hold the Volume Up + Power button simultaneously to boot into Fastboot Mode.
- Connect your phone to the PC with the help of the USB cable.
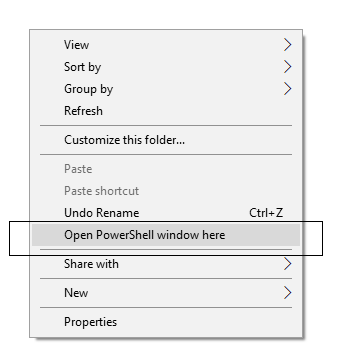
- Press and hold the SHIFT key and do a right-click on an empty space inside the folder.
- You should select the ‘Open PowerShell window here.’
For macOS or Linux based OS, open the Terminal and execute the following command:
cd /Desktop/adb/
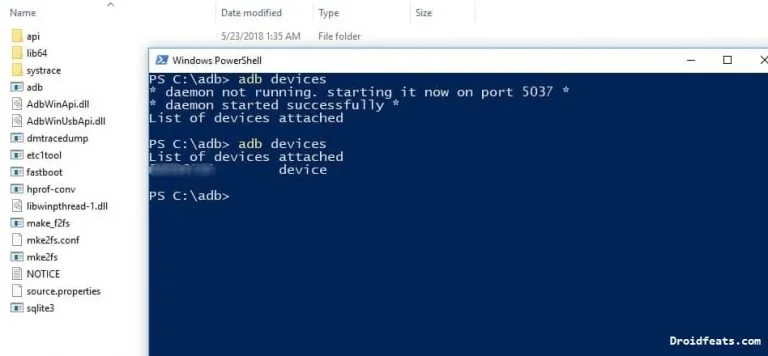
- Make sure that your device is being detected properly using the following command:
-
adb devices
- The command will return a unique device ID right with the ‘fastboot’ message.
For macOS or Linux OS:
./fastboot devices
- Finally, enable Camera2 API on Zenfone Max Pro M1 using the following command:
fastboot oem enable_camera_hal3 true
For macOS or Linux OS:
./fastboot oem enable_camera_hal3 true
- After executing the commands, you can reboot your phone by:
fastboot reboot
Now, check if the Camera2 API is enabled or not by using the Camera2 API Probe app from the Google Play Store.
So, you are done with enabling the Camera2 API on your Zenfone Max Pro M1. Now, the next step is to install GCam port. Download from the links given below and install it right away.
Download Google Camera port for Zenfone Max Pro M1
You can download GCam port APK for Asus ZenFone Max Pro M1 from the link given below and install it like normal APK. We have tested this app, and it’s working fine in all aspects. Check it out by yourself:
For other devices, you can check out this page:
How to install Google Camera Port APK on Zenfone Max Pro M1
- At first, download Google Camera App from the above links.
- Now, connect the phone to the PC by using a USB cable.
- Next, you need to enable MTP/Transfer Files mode on your Android device.
- Then transfer the downloaded APK file to the storage of your phone.
- Now, disconnect the phone.
- Then, open the file manager app on your phone.
- Now, you need to navigate to the location where you transferred the APK.
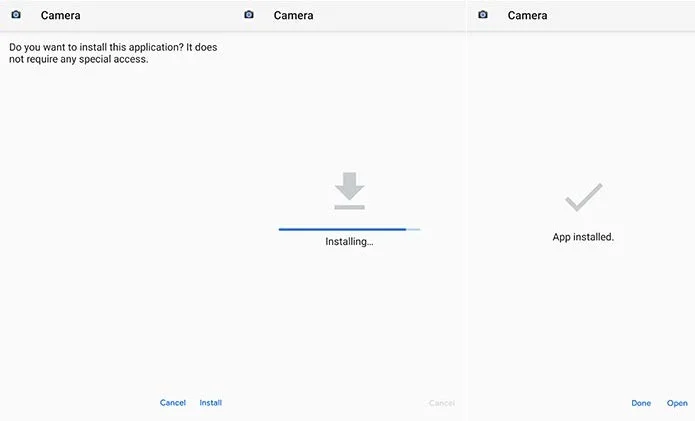
- Next, tap on the “<Google-Camera-file-name.apk>” file.
- Now, you must follow the on-screen instructions and install Google Camera App.
| Highly Recommended: Google Playground APK for Non-Pixel Devices [Download] |
How to Use Google Camera App?
Once the installation process is over, then open the app drawer and launch the new camera app. As you launch the app for the first time, you see prompts to seek required permissions. Then, you would see a few infographics. This would help you can get accustomed with the Google camera app with HDR+ and Portrait mode.
What’re your Views?
Did you find the Google Camera app performing better than the stock one? Do let us know by commenting below!
Sources: XDA / Asus Forum


![Download Nothing Phone 3a GCam Port [Most Compatible Version] Download Nothing Phone 3a GCam Port [Most Compatible Version]](https://static.droidfeats.com/wp-content/uploads/2025/04/Nothing-Phone-3a-450x254.webp)
![Download Redmi 9a GCam Port [Most Compatible Version] Download Redmi 9a GCam Port [Most Compatible Version]](https://static.droidfeats.com/wp-content/uploads/2025/03/Redmi-9a-GCam-Port-sample-450x245.webp)
1 Comment
Thanks for the detailed guide! I was able to enable the Camera2 API on my ZenFone Max Pro M1 and install the GCam port successfully. The image quality has improved significantly. Appreciate your effort in putting this together!