Being an Android user, if you have ever considered trying out ways to customise your device and add some extra cool features to it, I am sure you must have come across Xposed Framework at least once. Of course, it is the most popular mod that helps in adding core modifications to your Android device while running the Stock Firmware.
Xposed Framework for Android Oreo 8.0 and 8.1
It has been only a handful of months or so that this very fundamental tool, Android Oreo has become available for the Android users. Xposed finally supported Nougat in last October 2017 which was to cope up with the significant changes in the runtime environment. However, the developers had made a final official statement in the last December on the development status of that time which proved the imminency of Oreo. Lastly, today we are here to discuss about how to install Xposed Framework on Android Oreo with the release of Xposed v90 Beta.
See also: Xposed Framework Hub – Download and install on any Android device!
Xposed for Android Oreo was announced by Developer rovo89 at the official XDA thread. Xposed v90 Beta supports Android 8.0 Oreo (SDK 26) and Android 8.1 Oreo (SDK 27). Make sure that you give a read through the release notes of this update before carrying out the rest of the procedure.
- It is confirmed to be stable for regular uses with the release tagged as ‘Beta’.
- Some of the also may crash. However, this trouble is being attempted to sort out soon, and a fix is expected to be available through another Beta update.
Irrespective of the fact that how you are running Oreo on your device (Officially or unofficially), it is now pretty simple to install Xposed Framework on Android Oreo by following these easy step-by-step guide stated below.
[alert-note]Take a complete backup of your device before installing the Framework. You may even choose to take a full Android backup of your present ROM setup as well.[/alert-note]Install Xposed Framework on Android Oreo
There are basically two simple methods to install Xposed Framework on Android Oreo. You can simply use Magisk. The second option is to flash the official installer zip using TWRP recovery by using SuperSU for root.
Method #1: Using Magisk
Xposed Framework could be easily installed on Android Oreo with the help of a Magisk module that has been released by the Developer – topjohnwu. With this process, you would not require modifying the system.
- Go to the app drawer.
- Launch ‘Magisk Manager’ app.
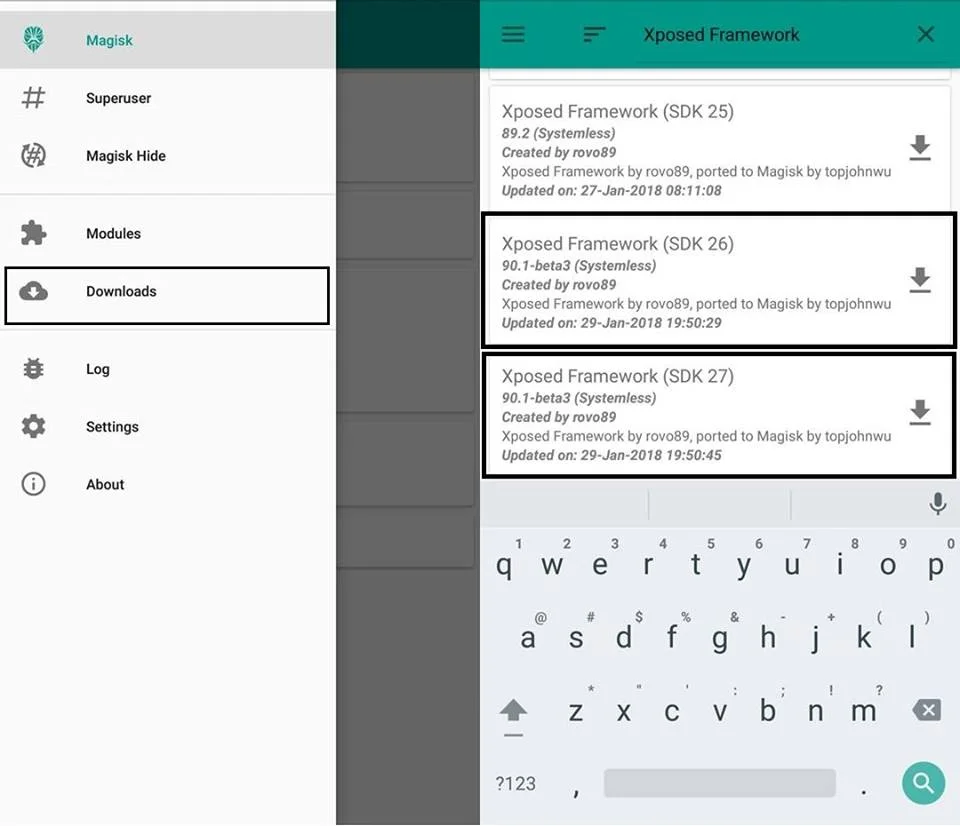
- Tap on the menu icon (3-horizontal lines) on the top-left corner of the screen.
- Select ‘Downloads’ from there.
- Press the search icon.
- Input ‘Xposed Framework’ in the field.
- Now, tap on the download icon that is situated next to the module name.
- Android 8.0 Oreo > Xposed Framework (SDK 26)
- Android 8.1 Oreo > Xposed Framework (SDK 27)
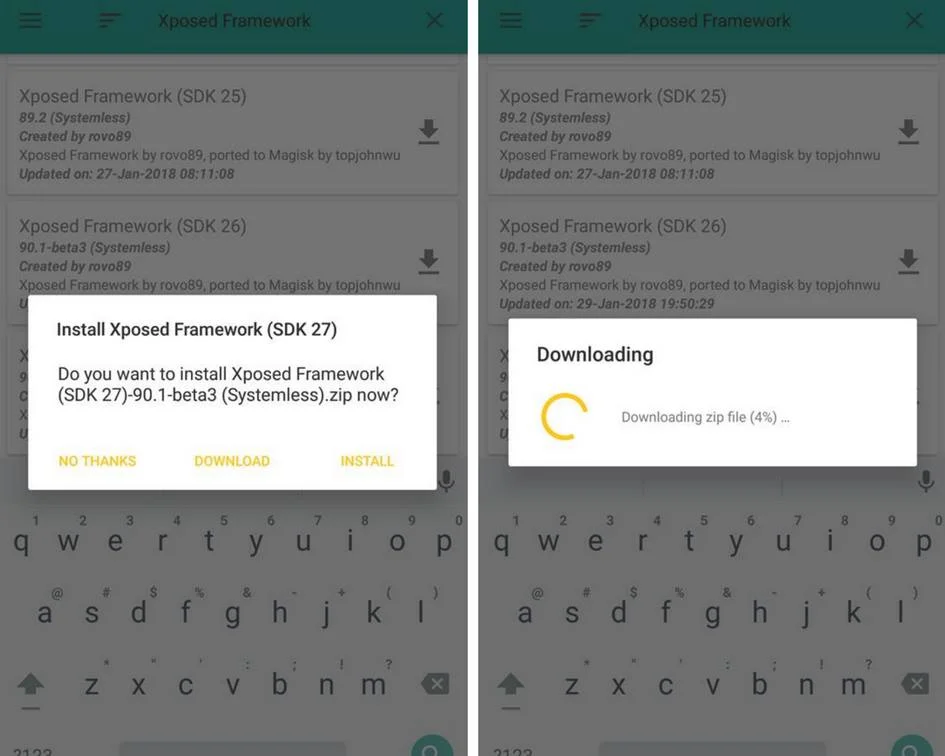
- Tap on ‘INSTALL’.
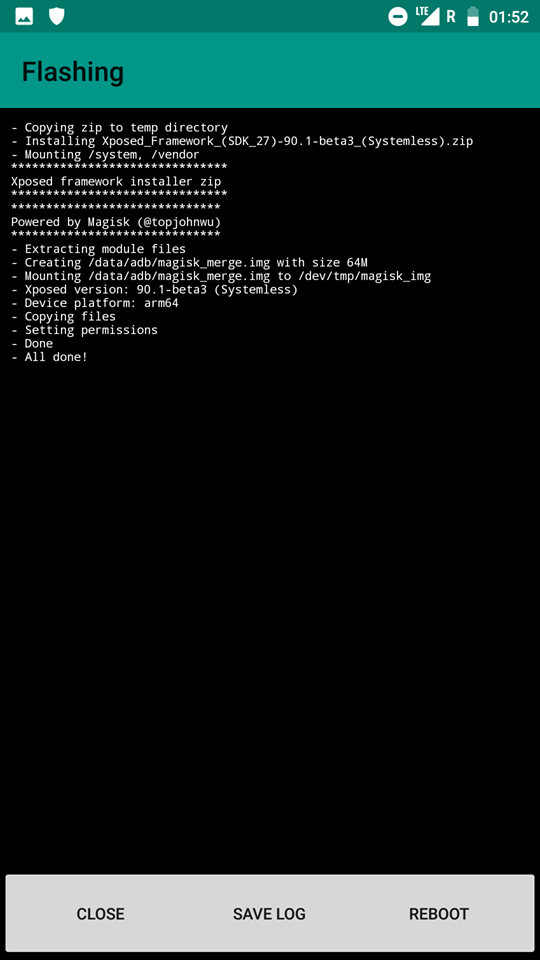
- It will automatically install Xposed Framework on Android Oreo once the module gets downloaded.
- Tap on ‘REBOOT’ to complete the procedure.
- Download the modified Xposed Installer app (Developed by topjohnwu) and install it on your device to start using Xposed for Oreo.
- Download the APK.
- Install it on your device using a file manager: XposedInstaller_3.1.4_Magisk.apk
- Lastly, reboot your device again.
That completes your entire procedure, and you have succeeded to install Xposed Framework on Android Oreo.
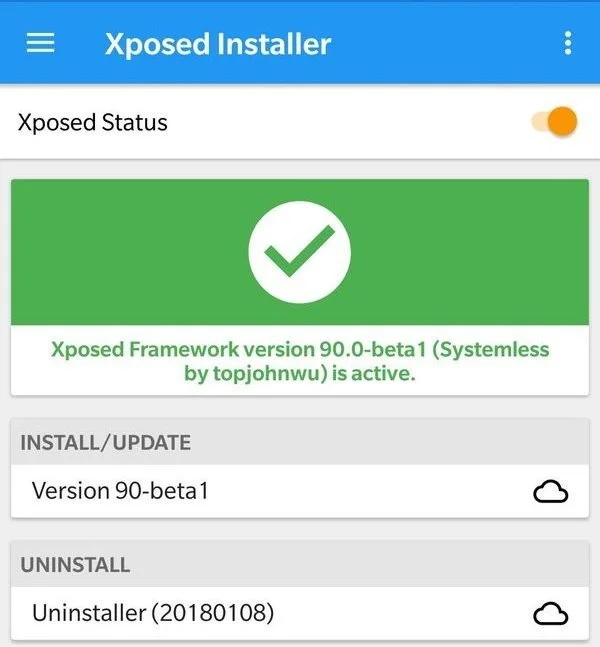
The app must show “Xposed Framework version 90.0-beta1 (Systemless by topjohnwu) is active“ after your Android device boots. Now, you can proceed to download and install Xposed modules.
Method #2: Using TWRP
The next convenient method of installing Xposed Framework on Android 8.0/8.1 Oreo is by flashing the Xposed Framework ZIP file using TWRP custom recovery. Make sure you have the correct TWRP installed on your device.
- Download the Xposed Installer ZIP file based on the Android version of your phone.
— Android 8.0 Oreo (SDK 26)
— Android 8.1 Oreo (SDK 27)
(Make sure to select the compatible version based on your device’s architecture – ARM, ARM64, or X86.) - Copy and paste the downloaded zip file to the internal storage of your phone.
- Switch Off your phone and disconnect the cable.
- Press and hold the special buttons of your phone to enter into the recovery mode! Alternately, if you have ADB installed on your computer, you may use the following command to enter to the recovery mode:
adb reboot recovery
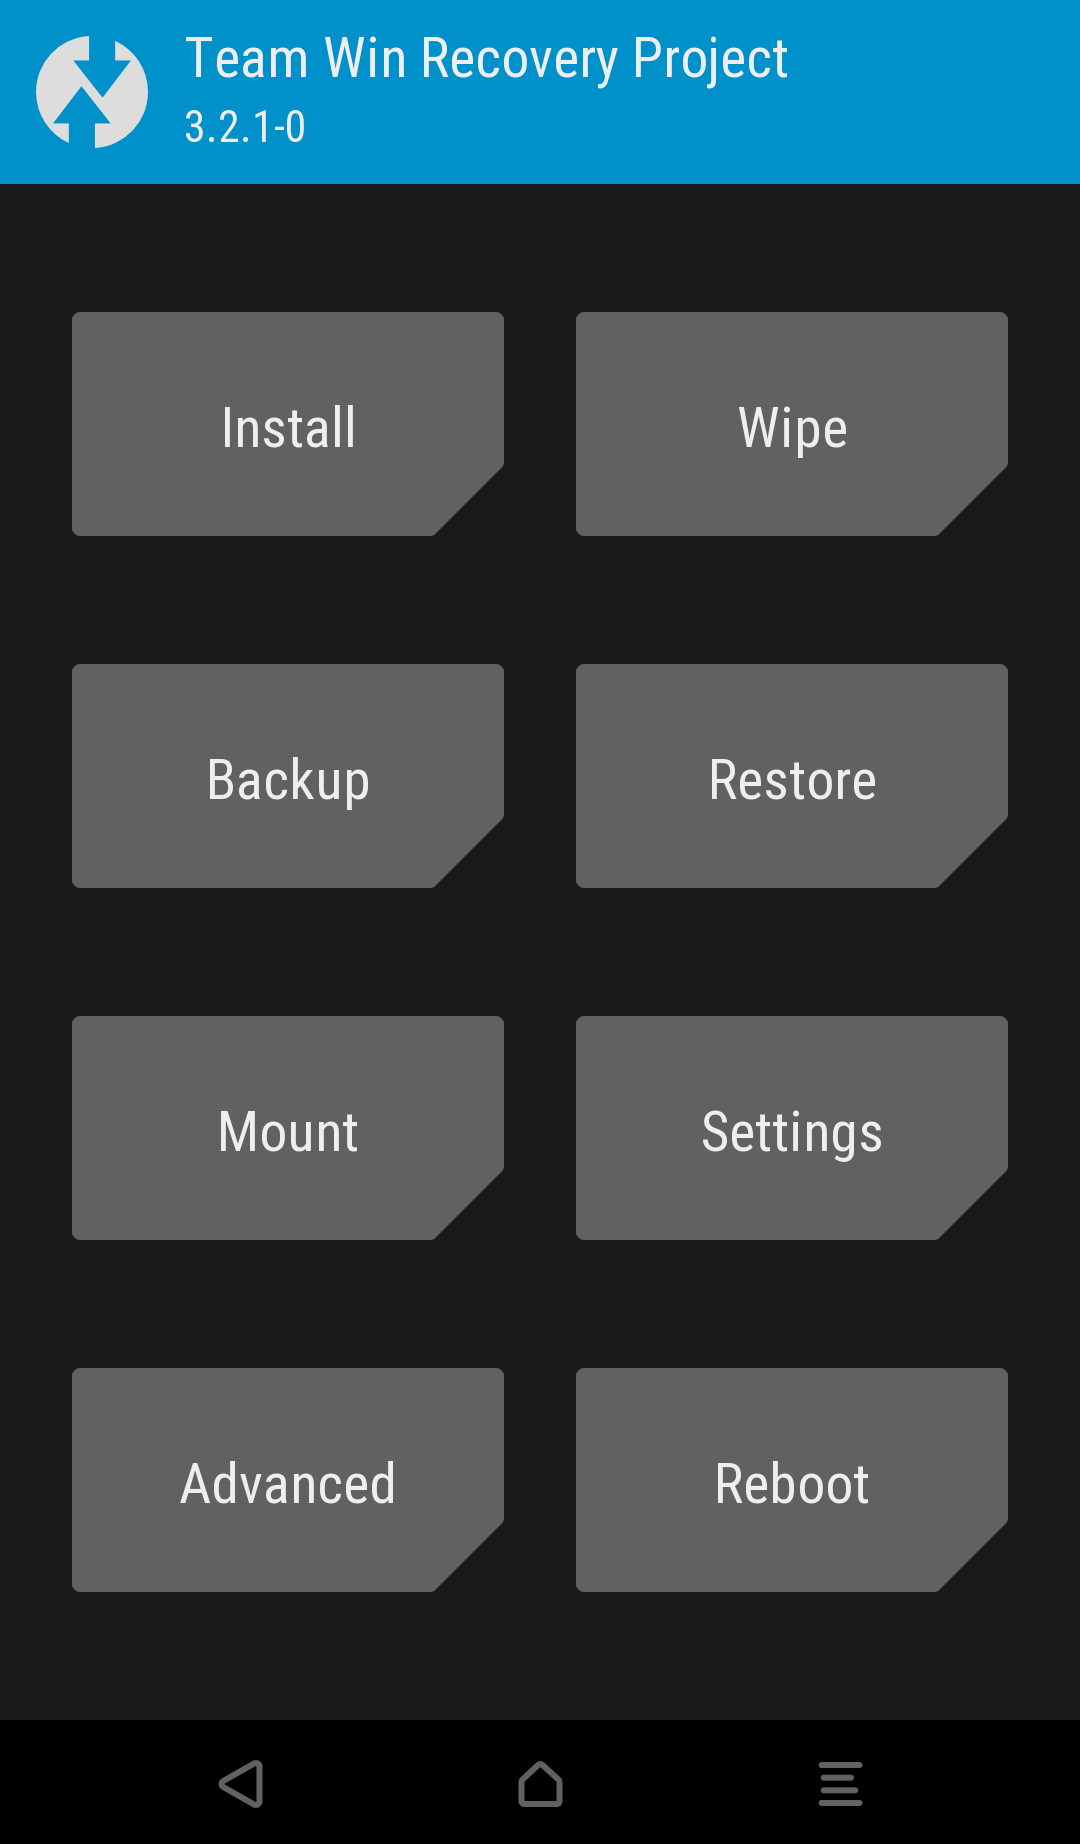
- Once you are in the TWRP recovery mode, tap on “Install” button. From the list, choose the zip file that you have copied in Step 2.
- Confirm the installation by swiping the “Swipe to Confirm Flash” option on the next screen.
- Now, tap on the “Wipe cache/dalvik” button to clean the ROM and stay away from any boot loop issues.
- Hit on “Reboot System” button!
- Once the device boots, download the official Xposed Installer app and install it on your phone.
[mks_button size=”medium” title=”Download Xposed Installer” style=”squared” url=”https://www.apkmirror.com/apk/rovo89/xposed-installer/xposed-installer-3-1-4-release/xposed-installer-3-1-4-android-apk-download/” target=”_blank” bg_color=”#1e73be” txt_color=”#FFFFFF” icon=”fa-android” icon_type=”fa” nofollow=”1″] - The app must show “Xposed Framework version 90.0-beta1 (Systemless by topjohnwu) is active.” message, as shown below:
You are done! You shall now go ahead and start installing the Xposed module on your phone. The official repository is a home of thousands of module. But before installing any mod, make sure to check the compatibility with Android Oreo.
If you encounter any problem, please comment below, and we will get back to you as soon as possible.
Please don’t forget to share if you have found this post helpful!


![MX Player Custom Codec [AC3, DTS, MLP, TrueHD, and more] MX Player Custom Codec [AC3, DTS, MLP, TrueHD, and more]](https://static.droidfeats.com/wp-content/uploads/2020/03/MX-Player-Custom-Codec-450x265.png.webp)

