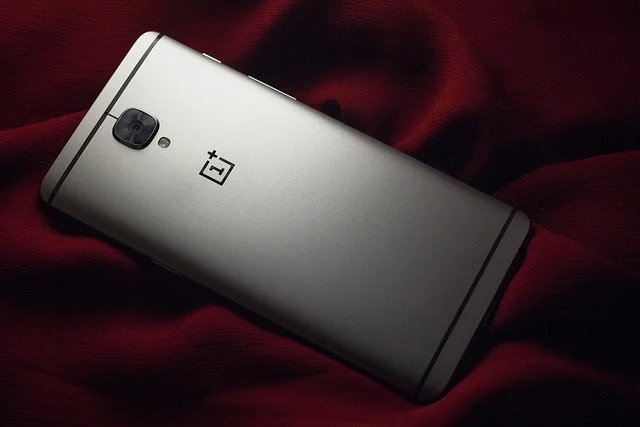
OnePlus recently released Oreo update for the OnePlus 3/3T via OTA (Over-the-air). Previously, a Beta build was released in October. But now, the final build of Oreo is rolling out. This update is available to all the user as Official Build. In this guide, we will explain entire step-by-step tutorial on How to Flash OnePlus 3 Oreo Update.

If you are on Android Nougat and did not receive the update via OTA, you would not rather wait for the Push Update on your device, you can manually download the Zip file from below and install it properly.
Please read the entire tutorial below and wait for a little, you will be ready to enjoy the test of Android Oreo.
The System (Factory) Images for both the phones are about 1.5 GB and you can download from the Official Link below:
A complete guide on how to install OnePlus 3 Oreo Update is here. We will be covering entire step by step tutorials and instructions. Please read all the steps carefully and make sure to read the whole tutorial once before actually performing on the device.
If this is your first time installing a Custom ROM or an Official Firmware, we understand you would want to make sure everything goes smooth. So before actually performing anything on your device, make sure to backup all your Data, Files, Contacts, WhatsApp chats and SMS.
We will be playing a clean flash; your entire data will be wiped clean — like a brand new phone.
Disclaimer: All the custom ROMs, Official Firmware, How-to guides, tutorials, roots, hacks and tricks mentioned on our site belong to the respective developers. We are not responsible if anything goes wrong with your device. Perform it at your own risk.
This fantastic Android 8.0 Oreo ROM for the OnePlus 3/3T comes with it tons of new features. We are mentioning some of the leading features below. Hope you would like to use on your device.
- Swift moves, behind the scenes
- Accessibility button
- Notification snoozing
- Project Treble
- Integrated printing support
- Google Play Protect
- Notification Dots
- Android Instant Apps
With this new update, you will get access to the like of Notification Dots, Google’s Autofill API, smart text selection and picture-in-picture.
NOTE: This OS is only for OnePlus 3T. Please do not try with any other variant of OnePlus phones.
USB Driver
Make sure you have correctly installed OnePlus 3/3T USB Driver on your computer. If not, please download from any official source and install it correctly. Otherwise, your computer will not detect your device.
Things to Remember
- Make sure your phone has at least 80 – 85% charge. If not, please do charge it before starting the experiment.
- Make sure your device has TWRP Custom Recovery installed from before. Otherwise, this tutorial will not work!
- This tutorial will WIPE OUT all your DATA. Make sure to create a Backup of everything before starting the tutorial.
- Your phone should have OnePlus Stock Recovery installed from before. TWRP Custom Recovery will also work in this case.
How to Install OnePlus 3 Oreo Update
We have mentioned full step by step instructions on OnePlus 3 Oreo Update. If you are entirely new for flashing a Custom ROM or an Official Firmware, please read the entire tutorial once before actually performing it on your device.
TUTORIAL: (Step by Step Guide)
For Stock Recovery
- Download OnePlus 3/3T Oreo Update – Official OxygenOS Oreo ROM to your computer.
- Connect your device to the computer using USB Cable and Copy / Paste the Downloaded Zip file in the internal storage.
- Switch OFF your phone and disconnect the USB Cable.
- Now get into recovery mode by pressing and holding Volume Down and Power Button together.
- Select “Install from internal storage/Install from local”, find your .zip file and click on “Install” to confirm.
For TWRP Recovery – and you want a dirty flash!
If you are in OxygenOS with TWRP Custom Recovery and you want a dirty flash without losing your data, follow the above steps and boot into recovery mode.
- Choose “Install” option in TWRP Custom recovery.
- Choose the ROM zip file that you have copied to your phone.
- Swipe to flash and then reboot your device.
For TWRP Recovery – and you want a clean flash!
If you are in any Custom ROM with TWRP Recovery and you want a clean flash, follow the above steps and boot into recovery mode.
- Go to “Wipe” option in TWRP Custom recovery.
- Now Swipe to Factory Reset.
- Now go back to the TWRP Home and Select “Install” option.
- Select the ROM zip file that you have copied to your phone.
- Swipe to flash and then reboot your device.
Wait a while, and your phone will take not more than 10 minutes to boot for the first time.
Hurray! Your OnePlus 3/3T should now have Android 8.0 Oreo Official Firmware. Go to Settings > About phone to verify.
If you run into any problem, please comment below, and we will get back to you as soon as possible.
Please don’t forget to share if you found this post helpful.

![Download Vivo X200 FE GCam Port [Most Compatible Version] Download Vivo X200 FE GCam Port [Most Compatible Version]](https://static.droidfeats.com/wp-content/uploads/2025/07/vivo-x200-fe-in-four-aesthetic-color-options.png-300x179.webp)


![Download OnePlus 11 GCam Port [Most Compatible Version] Download OnePlus 11 GCam Port [Most Compatible Version]](https://static.droidfeats.com/wp-content/uploads/2025/02/OnePlus-11-GCam-Port-450x245.webp)


3 Comments
Wow! Thank you!
Amazing!
Hi!
I’m running RR on my OP3 and decided to switch back to Oxygen OS due to some issues. Running blu spark’s TWRP and followed the clean flash that’s mentioned here (and also on the OnePlus Website). This is the error I get:
E3004: “This package is for OnePlus 3 devices; this is a “”.
Updated process ended with ERROR: 7
Any suggestions? Found an XDA thread that says you need to use blu sparks TWRP but I’m already using that.