Update Moto Z Play to Android 8.0 Oreo Official Firmware using this guide. After a series of soak testing, Motorola has finally rolled out the Android 8.0 Oreo final stable build to all their devices. We have the full update package of Android 8.0 Stable build for Moto Z Play which you can install right away using this guide.
The changes are quite substantial. Ranging from UI tweaks, Android 8.0 Oreo comes with much better security and performance reliability. You can test the new features on your Moto Z Play once the installation is completed.
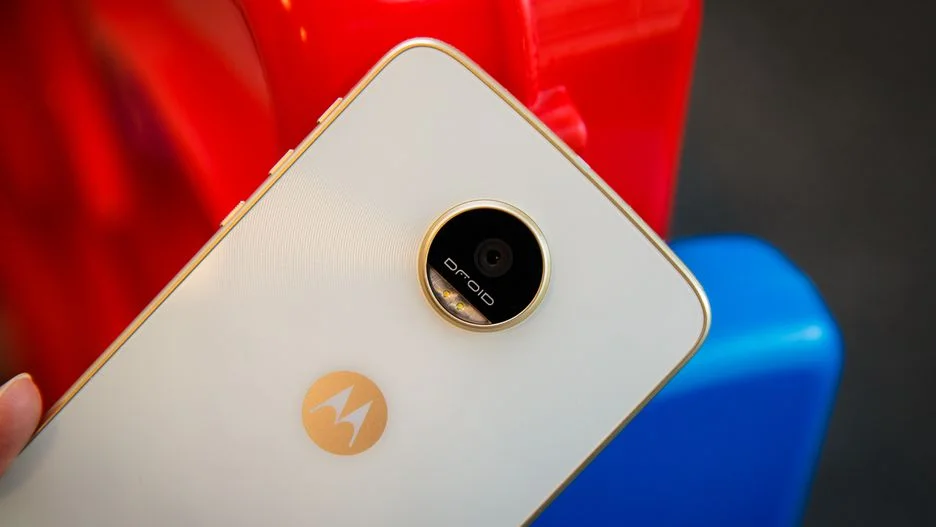
Please go through the tutorial below if you have got a Moto Z Play lying around and you have been looking to try out the Android 8.0 Oreo update. This post consists the step-by-step instruction by which you can install Android 8.0 Oreo Official Firmware on Moto Z Play. We have composed it for your sake very carefully.
Before starting the tutorial, make sure you are in the latest Android 7.1.1 Nougat which includes February 2018 security patch, or you can be in the latest Android Oreo soak test.
Firmware Details: Android 8.0 Oreo for Moto Z Play Official
Android 8.0 Oreo comes with tons of new features which increase performance reliability and security. Some of the main Oreo features are listed below! We hope you would love it using on your Moto Z Play.
- Picture-in-picture
- New app notifications
- Auto-fill (like in Chrome)
- Better copy and paste
- Faster Android behind the scenes
- Big ole battery boost
- Keep tabs on app security in Google Play store
- Android Easter Egg and emoji
- High-performance Bluetooth audio
We hope you love Android 8.0 Oreo Official Firmware for Moto Z Play. Certainly, we love it too, but before you look forward to installing it on your phone, kindly go through the important information mentioned below before jumping on to start the tutorial.
Moto Z Play Plus USB Driver
Make sure you have correctly installed Moto Z Play USB Driver on your computer. If not, please download it from our USB Driver Section below and install it correctly. Otherwise, your computer will not be able to detect your device.
Backup your Android Device
We don’t want you to lose any data, or anything could go wrong unexpectedly. Before starting the tutorial, we strongly recommend you to make a full backup of your phone. If possible, take a full Nandroid Backup via TWRP, or you can try out some of the Hand-Picked Android Backup Apps to secure your data quickly.
Things to Remember
- This guide is only for Moto Z Play. Please do not try with any other Moto Z variant.
- Make sure your phone has at least 80 – 85% charge. If not, please do charge it before starting the experiment.
- This tutorial will WIPE OUT all your DATA. Make sure to create a Backup of everything before starting the tutorial.
- You need to enable USB Debugging mode to connect your Android phone to computer. (Settings > About Phone > Build number > Tap it 7 times to become developer; Settings > Developer Options > USB Debugging).
Download Moto Z Play Android 8.0 Oreo OTA
How to install Android 8.0 Oreo on Moto Z Play
We have mentioned full step-by-step instructions on How to install Android 8.0 Oreo on Moto Z Play. If you are entirely new to rooting, flashing a Custom ROM or an Official Firmware, please read the entire tutorial once before actually performing it on your device.
[alert-note]Note: Make sure your phone is not modified. You should be in the latest Android 7.1.1 Nougat with February 2018 security patch or even in the latest soak test Oreo build.[/alert-note]- Download Android 8.0 Oreo for Moto Z Play from the link above.
- Install ADB and Fastboot driver.
- Switch OFF your device.
- Press and hold [Volume Down] + [Power] buttons till you see the bootloader/fastboot mode.
- Use Volume Keys to select “Recovery Mode” and press [Power] button to enter to the stock recovery.
- On the Android bot screen, hold the [Volume Up] button and tap the [Power] key once.
- Connect your phone to the computer using compatible USB cable (preferably, the official one, provided by Motorola with the phone box).
- Select ‘Apply update from ADB.’
- Now, extract the downloaded file (from Step 1) anywhere in the computer.
- Copy/Paste the extracted file to your ADB directory [C:\adb].
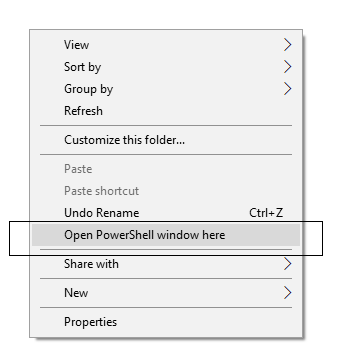
- Open Command Prompt on the same directory as the folder with Blur_Version.27.1.28.addison.retail.en.US.zip file. (Press the SHIFT key and right-click on an empty space. Select “Open PowerShell window here” or “Open command window here” from the pop-up menu.)
- Type the following code on your Command Window and HIT enter:
adb sideload Blur_Version.27.1.28.addison.retail.en.US.zip
- Your OTA installation should start now!
- Once the installation is completed, select “reboot system now” option from the recovery menu.
Wait a while, and your phone may take up to 10 minutes to boot for the first time.
You are Done!
Hurray! Your Moto Z Play should have got Android 8.0 Oreo installed by now. Go to Settings > About phone to verify.
Additionally, you can now try out some of the best Android Launcher on your new operating system.
So, this was our tutorial on how to manually install Moto Z Play Android 8.0 Oreo OTA using stock recovery.
Any Problem? If you encounter any problem, please comment below, and we will get back to you as soon as possible.
Please don’t forget to share if you have found this post helpful!

