Nokia 8 users can now install the latest TWRP 3.2.3 Custom Recovery on their device. TeamWin recently released TWRP 3.2.3 custom recovery version, and now the support extended to Nokia 8 officially. This means Nokia 8 users can now play with the stable version of TWRP and enjoy the full feature. The procedure of installation is similar to what you find on other A/B type partition Android devices. Luckily, we have the entire tutorial below, with which you can easily install TWRP on Nokia 8 and enjoy the extended support.
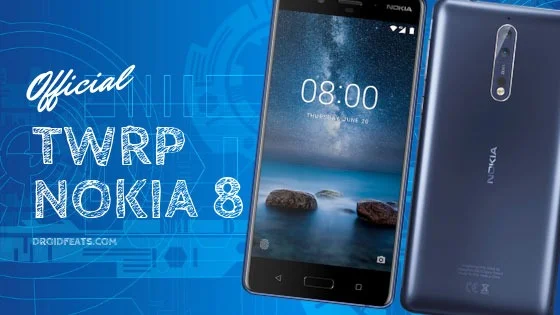
TeamWin is continuously developing its custom recovery since the day of Ice Cream Sandwich and Jelly Bean, thanks to its extended support and reliability to various devices. Nokia 8 users got official support, which means, you will also get future updates directly from their official website.
Not only they are extending support to a number of devices, but also, they are bringing new features, improvement and UX upgrade to their new builds. Let us see why do we need TWRP custom recovery.
Why TWRP Custom Recovery on Nokia 8?
If you want to utilize the full potential of your Nokia 8, you need to have a custom recovery like TWRP. Because, there are a lot of developments going on in the XDA forum, and the majority of them need root access and custom recovery to flash a ZIP file. Check out the quick list below:
- If you want root access on your phone to modify the system file, you need to flash SuperSU or Magisk ZIP file. Stock recovery can’t flash a ZIP file which is not signed by the OEM. Therefore, you need to have a custom recovery like TWRP to flash the files.
- The primary ability that TWRP offers over the stock recovery is to install custom ROM packages. You can try out different ROMs out there in the developer community, in case you are bored with the stock OS.
- TWRP has some unique features like Wiping Dalvik Cache, which clears all the junk files that are useless but occupying spaces on your devices.
- Backup: This feature is something that can save your device life in case of any custom ROM experiment. You can create a full nandroid backup image of your current OS, which you can restore later if required.
There are many more features, use it and explore.
See also: How to update Nokia 8 to Android 9 Pie Official Beta firmware manually
WARNING: All the custom ROMs, Official Firmware, How-to guides, tutorials, roots, hacks, and tricks mentioned on our site belong to the respective developers. We are not responsible if anything goes wrong with your device. Perform it at your own risk.
Pre-requisite
- Make sure your phone has at least 80 – 85% charge. If not, please do charge it before starting the experiment.
- You need to enable USB Debugging mode to connect your Android phone to computer. (Settings > About Phone > Build number > Tap it 7 times to become developer; Settings > Developer Options > USB Debugging).
- Your bootloader must be unlocked from before to install TWRP. If not, please do that first, then get back to our tutorial.
- You must install Android SDK tool on your computer.
- Also, enable OEM Unlocking in Developer Options which may need while flashing an image file.
- Install Nokia 8 driver on your computer.
Download TWRP (Official) for Nokia 8
Before starting the tutorial, please download the following files listed below to install TWRP on Nokia 8. Make sure to copy all the files on your computer, where the ADB and Fastboot files are present (C:\adb).
Installing TWRP in Nokia 8 is fairly easy using the provided files. Since this phone has implemented A/B partition scheme, the recovery itself is packed inside the boot.img (kernel).
We have mentioned the full step-by-step instructions on How to install TWRP Custom recovery on Nokia 8. If you are entirely new to rooting, flashing a Custom ROM or an Official Firmware, please read the entire tutorial once before actually performing it on your device.
How to install TWRP on Nokia 8
- Download all the required files from the above-given links to your device. Also, keep a copy of the TWRP image file on your computer.
- Connect your phone to the computer using compatible USB cable (preferably, the official one, provided by Nokia with the phone box).
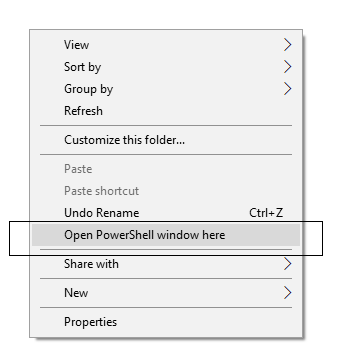
- Open Command Prompt on the same directory as TWRP file. Press the SHIFT key and right-click on an empty space. Select “Open PowerShell window here” or “Open command window here” from the pop-up menu.
- On the PowerShell Window, type the following command and HIT enter:
adb reboot bootloader
(This will reboot the device into fastboot/bootloader mode.)
└ If you get a permission pop-up on your device to Ällow USB debugging”, tap OK. - Once you are in the fastboot mode, type the following command and HIT enter:
fastboot boot twrp-3.2.3-NB1.img
(The command ends with the file name. If the file name changes in a newer version, type “fastboot flash <your-changed-name-here.img”)
- Once the file is flashed, reboot your device! Carefully hold the Volume Up button now. While holding, type the following command and HIT enter to reboot into TWRP recovery.
fastboot reboot
- TWRP Recovery: In order to reboot into recovery mode, use Volume rockers to select “Recovery mode” option and press Power button to select. You will get access to TWRP.
- Change partition slot: You should do this by selecting reboot, and then choose the other Boot Slot. (If it is already in A, then go to B or vice versa).
- You will be asked to enter your device Password/PIN/Pattern. Enter it to let system decrypt in recovery mode. If you don’t have any password, it won’t ask.
- Now, go back to main menu (TWRP Home) and tap on “Install” button. From the list, choose the TWRP Installer ZIP file that you have copied in Step 1.
- Confirm install.
So, you are done here! No further steps are required for TWRP image file.
So you are done with this tutorial! You had successfully installed TWRP on Nokia 8 using our guide. If you faced any problem with performing this tutorial, please let us know by dropping a comment below. Our team will reply you back as soon as possible.
Is this post helpful? Please do share it on Social Media to THANK US.







2 Comments
stuck in step 5, “< waiting for device >” there is no progres
Hi Kardry, can you send me the screenshot of your issue on my mail: [email protected]?