


From this post, you will be able to install Pixel Experience ROM based on Android 10 on your Asus ZenFone Max Pro M1. A detailed tutorial is given below, along with all the necessary download links; read ahead and grab them all.
Pixel Experience for Zenfone Max Pro M1 is an AOSP ROM based on Android 10. It is the same ROM as we see in Google’s Pixel devices. Because of the flexibility and reliability of Max Pro M1, the device got quite a good response from the developer community. Pixel Experience ROM is one of the best AOSP ROM right now in the Android community. Fortunately, Max Pro M1 got the official support from their developer, all thanks to them.
The best part of the Pixel Experience ROM is its OTA support. You don’t have to flash a new ROM, again and again, to update to a newer build. You can easily do the incredible update using OTA from the Settings menu. Currently, I am using this ROM on my Mi 9T Pro, and I am in love with its inbuilt features, especially the ease of customization from Android 10. The ROM is very clean without single bloatware. The speed is super fast like no one else; I can bet you won’t get other ROM as faster as the Pixel Experience on your Asus Max Pro M1.
But, one thing, I would like to remind you, this is not an official firmware by ASUS. So, it’s certain; there might be some minor bugs. You can report to the respective developer; they are quite responsive to bugs. Anyway, the other features will surely impress you; you will forget everything terrible on this ROM (my personal experience). As I am using on my Mi 9T Pro, I face some errors in the in-built photo apps and auto-brightness. But I am ignoring as I am in love with the other heap of goodies and fastness.
So, please read the guide ahead and install it right away! But before that, you need to keep some points on your mind. Especially if you are the first time dealing with the custom ROM, read this guide very carefully.
As Pixel Experience for Max Pro M1 is not an official update by ASUS, but a custom ROM, you need to have a custom recovery installed on your phone. We will use TWRP recovery on the tutorial to install the ROM ZIP file. Read ahead; we have a tutorial on installing TWRP as well!
What’s new in the Android 10 Pixel Experience ROM for Zenfone Max Pro M1o?

Pixel Experience for the ASUS Zenfone Max Pro M1 is an AOSP based ROM that includes Google Apps by default with all the Pixel goodies including a launcher, wallpapers, icons, fonts, and the boot animation. You can feel Google’s Pixel phone experience on your ASUS device, thanks to the developer for their support. As the latest version is based on Android 10, you will get everything based on Google’s newest update.
Android 10 (formerly Android Q), is a strong foundation with tons of helpful features, mostly improved gesture navigation, more nuanced notification controls, and better privacy. It completely reshaped the way of Android use, thanks for re-engineering the key software updates by Google and adding support for 5G and foldable devices. Following are some of the main features of Android 10:
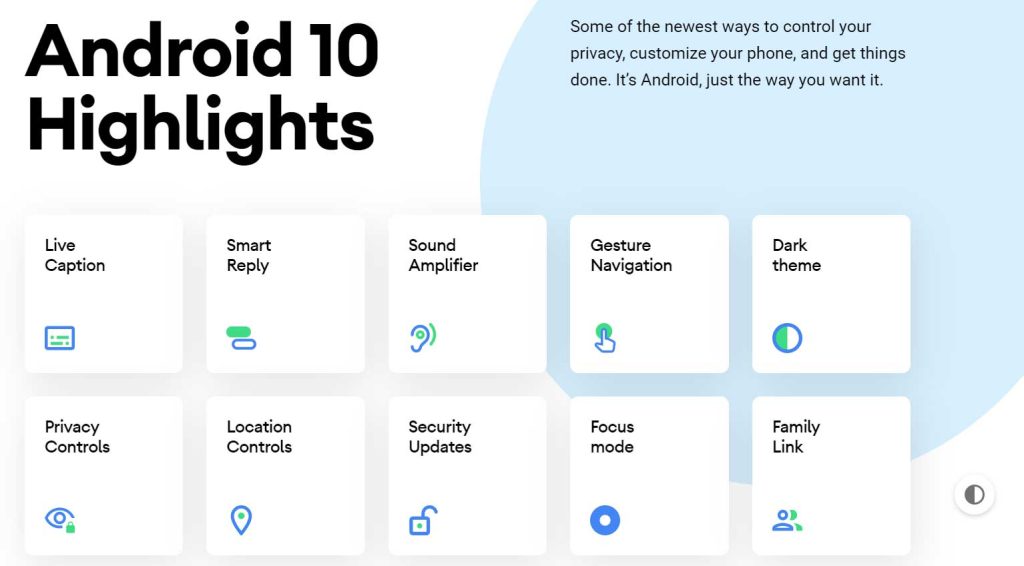
- Live Caption: Automatically caption media playing on your phone
- A dark mode
- Smart Reply for all messaging apps
- A better sharing menu
- Focus Mode
- Quicker access to settings
- A standard depth format
- An improved Files app
- Overhauled permissions
- Wi-Fi sharing via QR codes
- Gestures, app drawers play nicely
- Google Assistant ‘handles’
- Sound Amplifier
- Hearing aids get streaming support
- Security updates via Play Store
- Wet, overheating USB warnings
- Digital Wellbeing
- Family Link
To know more about Android 10, you can check out on the official site as well!
Screenshots of Android 10 Pixel Experience ROM
I have taken some screenshots of Pixel Experience ROM from my phone so that you can see a quick overview of the UI. The UI is so clean and has no bloatware. Check out:
LIKE this Android 10 Pixel Experience ROM for ASUS Zenfone Max Pro M1? We love it too, and we know you are looking forward to installing it on your phone. Please read the important information below before starting the tutorial.
Download Android 10 Pixel Experience ROM for Zenfone Max Pro M1
You can download the firmware file of Pixel Experience Android 10 ROM for Zenfone Max Pro M1 from the link given below.
Since Google apps are pre-installed on this ROM, you don’t need to download GApps ZIP to flash separately. Therefore, download the ROM ZIP file and continue.
- Related: Update ZenFone Max Pro M1 to Android 10.0 Stable (via AOSP Custom ROM)
Download TWRP Custom Recovery for Zenfone Max Pro M1
Since this is not an official update by the Asus, the stock recovery is not functional here. So, all you need to do is to install a custom recovery first. TWRP is what we need here; thanks to the same ROM developer for building TWRP for the Max Pro M1, which can flash Android 10 quickly. Download from the link given below:
Please keep in mind that this TWRP for Max Pro M1 is only for flashing Android 10. In case you want to go back to Pie build later, this recovery won’t work.
As you continue reading below, we will guide you through an entire step-by-step tutorial with all necessary tools.
If flashing via TWRP Recovery is not a new task for you, this guide would not be much difficult. We have covered entire step-by-step tutorial so that a new user can perform the flash easily.
You can quickly install Pixel Experience ROM on Zenfone Max Pro M1 using the tutorial below!
Please read the entire tutorial once before actually performing it on your device!
WARNING: All the custom ROMs, Official Firmware, How-to guides, tutorials, roots, hacks, and tricks mentioned on our site belong to the respective developers. We are not responsible if anything goes wrong with your device. Perform it at your own risk.
ASUS Zenfone Max Pro M1 USB Driver
Make sure you have correctly installed Zenfone Max Pro M1 driver on your computer. If not, please download it from our USB Driver Section below and install it correctly. Otherwise, your computer will not detect your device.
→Download the latest Asus ZenFone Max Pro M1 USB Driver
You may also like:
- Trending: Download YouTube Vanced APK LATEST (for any Android) – get premium YouTube features for free
- Must read: 9 best data tracker apps for Android!
Backup Zenfone Max Pro M1 (Warning)
But before starting the tutorial, we suggest you to backup your important documents from the device and make a copy of it to your computer. On performing our experiment, your device will get wiped, and you will lose everything from the phone. We don’t want that. in that case, we have a list of Application that may help you on creating backup within the phone. Later on, you can copy the files to computer for a safe side.
→ Top 10 Best Android Backup Apps – Secure your Data
Once you are sure that you are done with the backup stuff, please proceed to the tutorial below on How to install Pixel Experience ROM on Zenfone Max Pro M1.
Points to Remember
- Make sure your phone has at least 80 – 85% charge. If not, please do charge it before starting the experiment.
- This tutorial will WIPE OUT all your DATA. Make sure to create a Backup of everything before starting the tutorial.
- Make sure your device has TWRP Custom Recovery installed from before. Otherwise, this tutorial will not work!
- You need to perform a Dalvik Cache wipe in recovery mode before installing the ROM.
- You need to enable USB Debugging mode to connect your Android phone to computer. (Settings > About Phone > Build number > Tap it 7 times to become developer; Settings > Developer Options > USB Debugging).
Step #1: Unlock the bootloader on Zenfone Max Pro M1
(Skip this step if you had done this earlier!)
In order to install a custom recovery, your phone’s bootloader must be unlocked from before. As the ZenFone Max Pro M1 comes with a locked bootloader, you must unlock it first before installing a custom recovery. Unlocking Max Pro M1 is so easy as you do not have to mess with the coding part; thanks to the developer, to build a secure software which makes it possible to unlock the phone in a single click. Check out the steps given below:
- Download this UNLOCK RAR file on your computer.
- You shall get two folders inside the RAR file: unlock and ASUS_Android_USB_drivers_for_Windows
- If you have already installed a USB Driver from our above-given post, you can simply ignore the second folder.
- Once you are sure that USB Driver is properly installed on your PC, you can go to the unlock folder.
- Reboot your Max Pro M1 into Fastboot Mode and connect to the PC using a USB cable (prefer the one given by the company).
- Use the following button combination to boot your device into Fastboot Mode:
Volume up + Power - Now, finally, click on the unlock.bat file in unlock the folder.
- You are done. Reboot your device now.
Successfully unlocked the phone? So, the next step is to install TWRP recovery; read ahead!
Step #2: How to install TWRP recovery on Zenfone Max Pro M1 (Fastboot method)
(Skip this step if you had done this before)
We had mentioned earlier that this is not an official update by the ASUS. So the stock recovery is not functional here. You need to install a custom recovery first. TWRP is what we need here; install it from the tutorial below:
- Download TWRP recovery image (*.img) for your Android device.
- Now copy this image file to C:\adb folder where the ADB/Fastboot binaries will be present.
- Press and hold the SHIFT key and do a right-click on an empty space inside the folder.
- You should Select ‘Open PowerShell window here’.

- Now Boot your Android phone into the Bootloader/Fastboot mode.
- Connect it to the PC with the help of the USB cable.
- Make sure that your device is being detected properly using the following command:
fastboot devices
- The command will return a unique device ID right with the ‘fastboot’ message.

- Lastly, install TWRP recovery on the device using the following command:
fastboot flash recovery <recovery-image.img>
- Replace “<recovery-image.img>” with the real filename of the recovery image. Example:
fastboot flash recovery twrp-system-as-root.img
So this is how you can install TWRP recovery using Fastboot which will be working for the majority of OEM Android devices.
It’s done with the installing of the TWRP recovery on Zenfone Max Pro M1, and now you can go ahead as well as flash the AOSP Android 10 on Zenfone Max Pro M1.
Step #3: How to Install Pixel Experience ROM on Zenfone Max Pro M1
We have mentioned full step-by-step instructions on How to Install Pixel Experience on Zenfone Max Pro M1 Android 10 Custom ROM. If you are entirely new to rooting, flashing a Custom ROM or an Official Firmware, please read the entire tutorial once before actually performing it on your device.
TUTORIAL: (Step by Step Guide)
- Download Android 10 Pixel Experience ROM for Zenfone Max Pro M1 on your computer (from the above given download sections).
- Now, connect the device to your PC using USB Cable.
- Copy and paste the downloaded zip file to the internal storage of your phone.
- Switch Off your phone and disconnect the cable.
- Press and Hold Volume Down + Power Button together to enter into the recovery mode!
- Once you are in the TWRP recovery mode, perform a full data wipe by tapping on “WIPE” Button. Also, perform a factory reset by swiping on the “Swipe to Factory Reset” option at the bottom.
- Go back to main menu (TWRP Home) and tap on “Install” button. From the list, choose the zip file that you have copied in Step #3.

- Confirm the installation by swiping the “Swipe to Confirm Flash” option on the next screen.
- Now, tap on the “Wipe cache/dalvik” button to clean the ROM and stay away from any boot loop issues.
Google Apps: Repeat the above step (Step 7 to Step 9) for the Gapps zip file as well and install it on your phone. - Hit on “Reboot System” button!
Wait a while, and your phone will not take more than 10 minutes to boot for the first time.
Hurray! Your ASUS Zenfone Max Pro M1 should have got Android 10 Pixel Experience ROM installed by now. Go to Settings > About phone to verify.
Recommended: My suggestion for you!
After installing the ROM, do install a Google Camera port to get some dope experience in the camera module on Zenfone Max Pro M1. Check out this post:
- Download GCam Port for Asus ZenFone Max Pro M1 | Android 10 supports
- Download Magisk ZIP LATEST (All version) | GUIDE
So, you are done with the complete tutorial. We hope you now have a piece of explicit knowledge about how to unlock the bootloader, install TWRP recovery, and flash Pixel Experience on your Zenfone Max Pro M1. If you have any further queries, kindly leave them down in the comment box. Also, if you found this post helpful, do not forget to share it on Social Media to thank us.
![Best custom ROM for POCO F1 (Android 10 based) in 2021 [Tested]](https://droidfeats.com/wp-content/uploads/2020/11/Resurrection-Remix-450x270.jpg "Best custom ROM for POCO F1 (Android 10 based) in 2021 [Tested]")
![Install Android 10 BERYLLIUM Havoc OS 3.x on Poco F1 [Custom ROM]](https://droidfeats.com/wp-content/uploads/2020/10/BERYLLIUM-Havoc-OS-450x253.jpg "Install Android 10 BERYLLIUM Havoc OS 3.x on Poco F1 [Custom ROM]")
 to One UI 2.5 Official Firmware")