


From this guide, you will be able to root Android 11 using the latest revision of Magisk Canary. It’s the first version of Magisk that supports Android 11. The popular systemless root solution can now root Android R. Despite Google still developing the update and hasn’t yet announced a stable or even a beta build of Android 11 yet, Magisk Canary can easily root Android 11. Thanks to the developer for faster support, the reason why Magisk is so popular. If you are a Pixel phone user and have updated your device to any version of Android 11, you can root your device using Magisk Canary from the tutorial given below; read ahead!
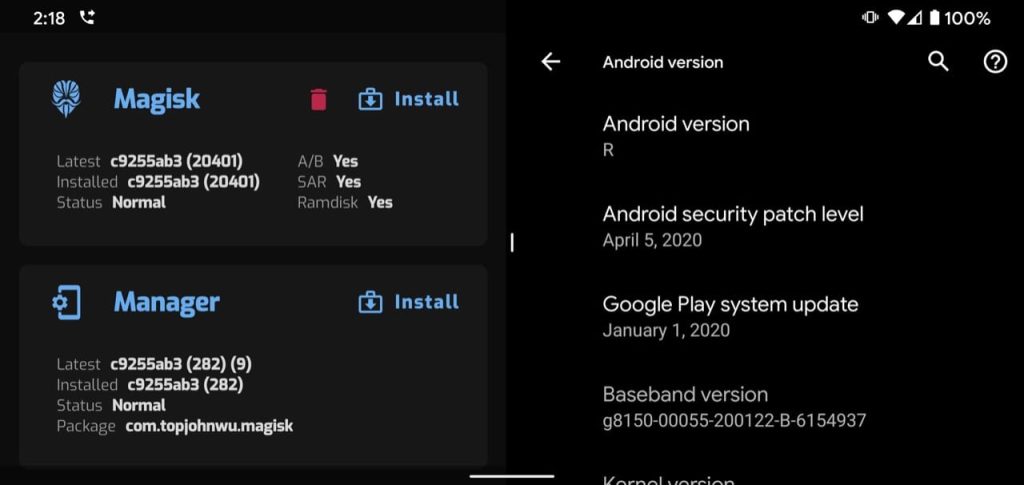
The first Developer Preview for Android 11 was released back in February, followed by the second Developer Preview last month. John Wu (the developer behind Magisk) released a Canary build that can root the Android 11. With each new Android version, it’s a challenging task for developers like John Wu to port the utilities and makes them work on the newer version. Fortunately, this process has passed pretty faster for the Magisk as the working solution has already released even though Android 11 is in the initial phase. Here’s the tweet from the developer:
Android 11 moved the Android runtime portion of the https://t.co/DcT3TPh55W.runtime APEX module into https://t.co/WPEpJlDLcp. Didn’t expect this change to affect Magisk, but well I fixed it anyways ????♂️
— John Wu (@topjohnwu) April 19, 2020
Ahead, you can download Magisk Canary build for the Android 11 and root your device running Android 11 OS.
What is Magisk root? (in case you are new)
Magisk root is the most popular root solution right now in the Android community. With its straightforward and systemless approach, along with the wide range of compatibility, most of the enthusiasts and developers rely on Magisk to gain root access on their phones. Recently, John Wu (aka topjohnwu), the developer behind Magisk, announced Magisk Canary iteration, which is meant to support Android 11.
Apart from the systemless approach, Magisk also comes with its own set of proprietary modular support, which is called a Magisk Module. You can access it from the Magisk Manager app itself. These modules can give you extra features that you won’t be able to find in stock firmware. Further, a third-party developer can create Magisk Modules and publish on their platform for specific devices. If you are looking to root your phone running Android 11, the all-new Magisk Canary is here for you. The download link for Magisk Canary is given below, along with the tutorial to install; read ahead!
WARNING: All the custom ROMs, Official Firmware, How-to guides, tutorials, roots, hacks, and tricks mentioned on our site belong to the respective developers. We are not responsible if anything goes wrong with your device. Perform it at your own risk.
Download Magisk Canary for Android 11
Canary is a separate channel for Magisk dedicated to the developers and enthusiasts who want bleeding-edge builds regardless of bugs or issues. The main aim of this specific build is to bring Magisk root on Android 11 regardless of stability. So, it’s quite sure; you might face some issues on the very first build for Android 11.
The latest build is available as a Magisk Manager app, which can patch the boot image of Android 11 and gain root access. Download Magisk Manager Canary for Android R from the link below:
Pre-requisites
You must be having the following requirements to be fulfilled before you head down to root Android 11 using Magisk.
- This tutorial may WIPE OUT all your DATA. Make sure to create a Backup of everything before starting the tutorial.
- It’s highly recommended that you must have a full backup of your device before rooting. You can do the backup on Android phones following our guide.
- Be sure that your phone is charged at least 80-90% so that you can avoid sudden shutdowns during the process.
- Initially, you must enable OEM unlocking and then unblock the bootloader of your device and only then you can root Android R.
- You may need to download and install USB drivers on your PC.
- You must have to install ADB/Fastboot tools on your PC.
Download Android USB Driver
Make sure you have correctly installed Android USB Driver on your computer. If not, please download from any official source and install it correctly. Otherwise, your computer will not detect your device.
Backup your Android Device (Warning)
Patching a boot file on Android 11 may erase everything from your phone. This includes SMS, photos, apps, videos, games, contacts, or anything on your internal storage. So, before proceeding to the tutorial, make sure to back up everything from your device. This backup application list might help you:
Samsung users can use Samsung Smart Switch to backup data on the computer. Samsung Smart Switch even allows the users to move data from one device to another of different variant (like moving data of Galaxy S9 to Galaxy S10).
Once you are sure that you have completely backed up your data, proceed to the tutorial below to root Android R using Magisk Canary.
How to ROOT Android 11 using Magisk Canary
After downloading the Magisk Canary, please carefully follow the steps below in order to gain root access on your device running Android 11. If you are playing with rooting stuff for the first time, please make sure to read the entire tutorial once before actually performing it on your device.
Total Time: 1 hour
Extract the boot image
Depending upon the device, you need to download the Android 11 firmware file (ZIP) and extract the boot image. After extracting, copy the boot image (IMG) to the device’s internal storage.
Download Magisk Canary for Android 11
Make sure you have downloaded the Magisk Canary for Android R from the above-given link and install it like a standard APK.
Open Magisk Manager
Open the Magisk Manager and tap on INSTALL, as shown below: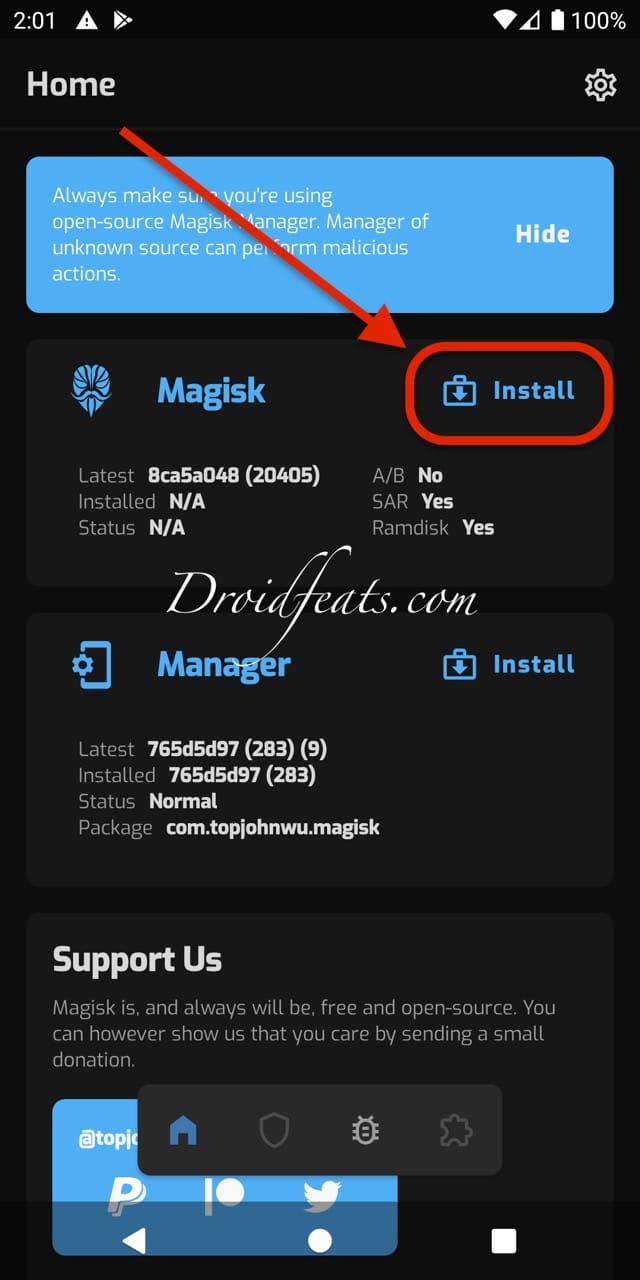
Magisk Manager permission
A pop up may show to allow Magisk Manager to access photos, media, and files on your device. Just allow everything!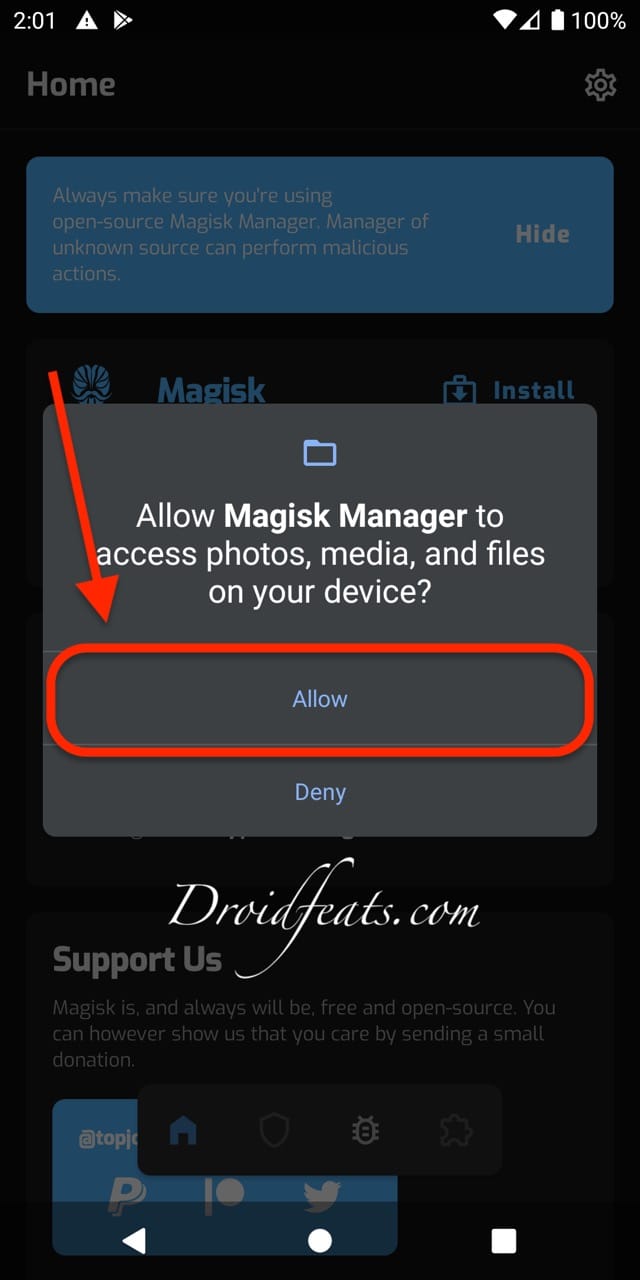
Select Install options
Make sure to check the two options, as shown in the screenshot below, and tap on the NEXT.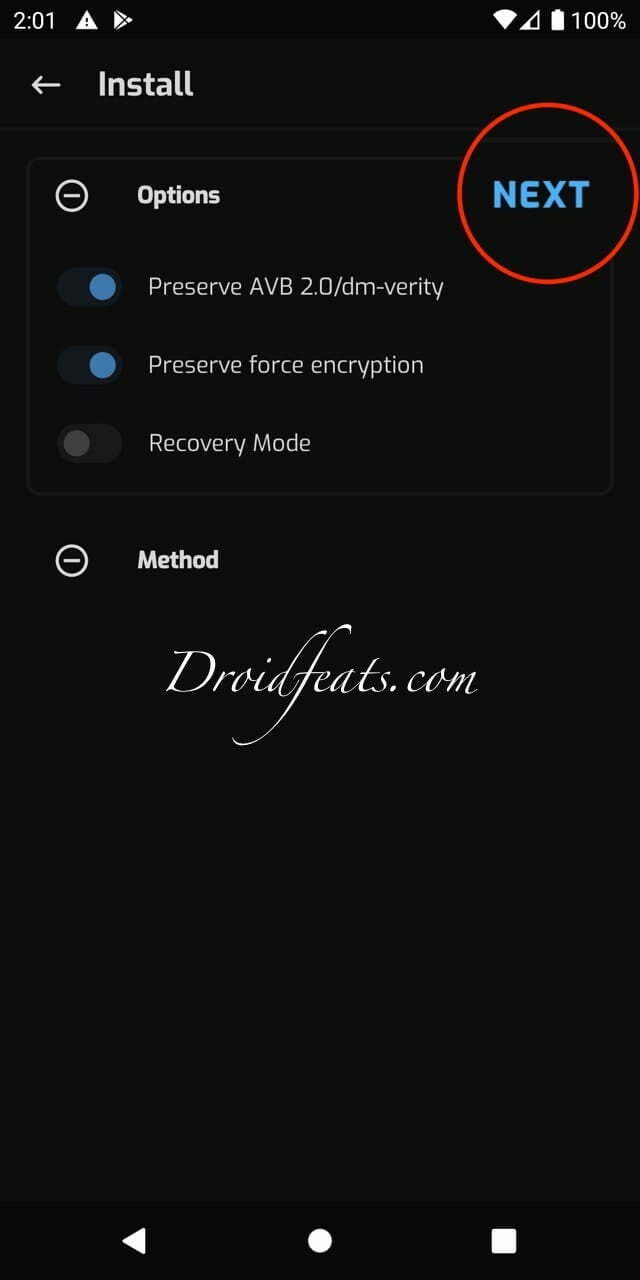
Select and Patch a File
In the next window, tap on Select and Patch a File. Then select your stock boot image (IMG) file that you had copied in Step 1 from the device’s internal storage.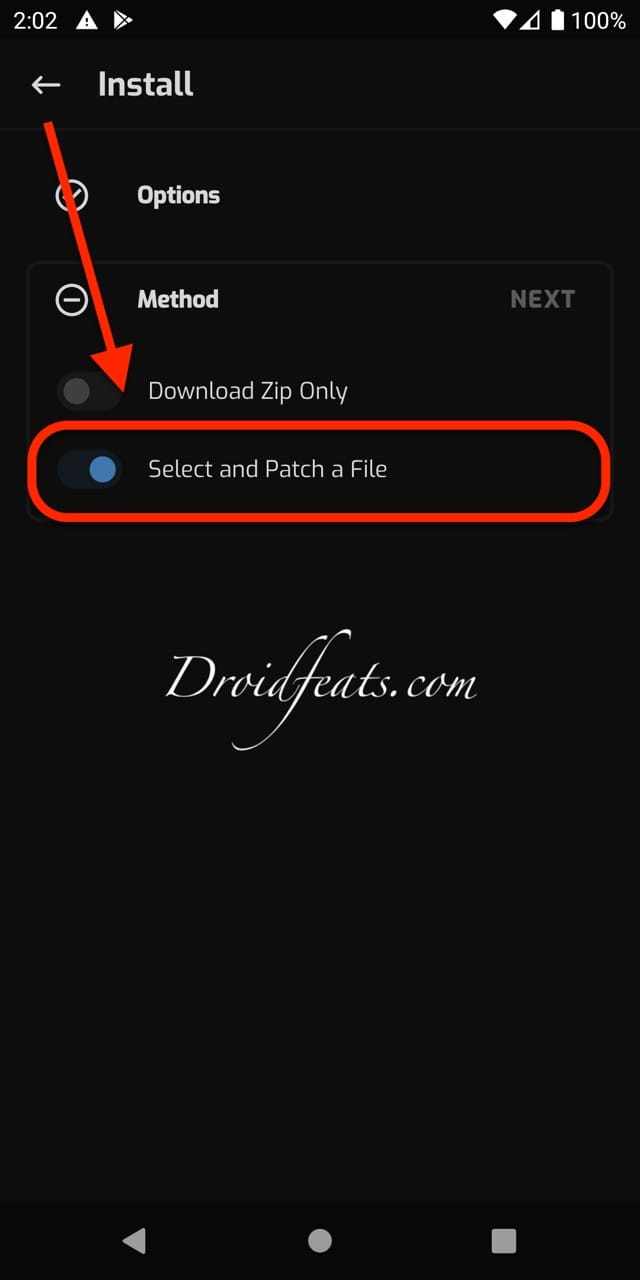
Patching process
Magisk Manager will now patch your boot image and deliver you a patched image (magisk_patched.img) within the download folder of your device. Find it out in your internal storage.
Transfer to PC
Now, transfer the patched boot image from the device to your PC (C:\adb folder).
Fastboot Mode (using button combination)
Reboot your phone to the Fastboot Mode by pressing and holding the button combination. Alternately, check the next steps to enter to fastboot using the command, in case you don’t know the button combination.
Fastboot Mode (using PC command)
Go to C:\adb folder where the ADB/Fastboot binaries are present.
Open PowerShell window
Press and hold the SHIFT key and do a right-click on an empty space inside the folder. You should Select “Open PowerShell window here“.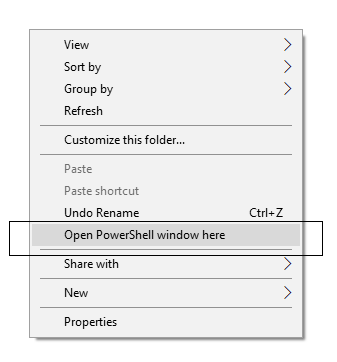
Connect to PC
Connect your device to the PC with the help of the USB cable (preferably the one provided by the company).
Bootloader mode using command
Now boot your device into the Bootloader/Fastboot mode using the following command:
adb reboot bootloader
Verify fastboot devices
Make sure that your device is being detected properly using the following command:
fastboot devices
Unique ID
The command will return a unique device ID right with the ‘fastboot’ message.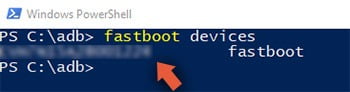
Root Android R
Lastly, root Android R using the following command:
fastboot flash boot magisk_patched.img
Reboot
Reboot your device manually or enter the following command:
fastboot reboot
That’s it!
So you are done with this tutorial! You had successfully rooted Android 11 with Magisk Canary using our guide. If you faced any problem with performing this tutorial, please let us know by dropping a comment below. Our team will reply you back as soon as possible.
Done with the rooting? Here’s some extra goodies:
Check out our root based post for any Android devices:
- Install Android 11 on Mac / Windows PC using Android Studio [GUIDE]
- Download TaiChi Module to run Xposed Framework
- MX Player Custom Codec [AC3, DTS, MLP, TrueHD, and more]
- Download Galaxy S20 Cut-out Wallpapers (Infinity-O, Hole-Punch) collection
Why Magisk?
It is a very common question that people ponder over if they haven’t yet tried it.
For those who are new to Magisk, these points will certainly peak your interest in Magisk:
- Constant and continuous app testing by Magisk for better properties integration
- Systemless approach
- It doesn’t modify any partition or memory of the device, so installation and un-installation is easy
- Magisk modules are available in Magisk Manager only.
We know the necessity to root, how to install and update Magisk and why to choose it. I hope you have a better understanding of Magisk and willing to try it out for your Android device.
[If you don’t like it, there is always the option to remove it with just a few clicks.]
Verdict
There is numerous root software but, many don’t sustain the community due to various reasons like stability, too many bugs and errors, zero improvement and more.
Magisk doesn’t belong to that category since the latest version explains a lot about its stability and the increase in users proves its popularity among Android community.
I hope you will try to install Magisk to have your Android device more personalized by customizing it to suit your style and taste.
FAQs
1. Is this a stable build?
No, it’s on the Canary channel. You might face some bugs initially, as Android 11 is still on a developer preview phase.
2. Can I perform this tutorial other than Pixel devices?
Obviously, yes, provided, the device is running on Android 11.
3. Where can I report a bug on Magisk Canary for Android 11?
If you experience any issues, file a bug report on the project’s GitHub repository.
 using Magisk Manager and root")
2 Comments
On the latest build (Beta 2) this method no longer works for the app-debug.apk version (topjohnwu has removed app-release.apk for canary).
After fastboot flashing the magisk_patched.img, to the home screen, there is a pop-up warning that shows before the home screen loads regarding the beta, and the digitizer doesn’t work. So basically if you can’t get past the pop-up, you can’t do anything else, since the operating system won’t load unless you tap the ‘ok’ button
Hello,
Thanks for sharing the information.