This is a detailed guide on how to root Samsung Galaxy S10, S10e, and S10 Plus. If you are dealing with the rooting stuff for the first time, read this guide twice carefully before attempting anything on your device. The tutorial has been divided into two parts: one is for unlocking bootloader on Galaxy S10, and the other one is rooting the device using Magisk systemless root utility. There are a few tools you need to download before proceeding to the tutorial below. So, read ahead and grab them all.

Samsung has improved its software part with the new One UI on Android Pie update on their new devices. The new Galaxy S10 series comes with One UI out of the box. If you are in the Android market right now for a premium smartphone, you will see the most probable option is the Galaxy S10 and its siblings. However, now, you would be glad to know that our Recognized XDA Developer topjohnwu has managed to gain root access on Samsung Galaxy S10, S10 Plus and S10e using a Canary release of Magisk.
This is what he Tweeted on his official handler:
Samsung has implemented more complexity on the Galaxy S10 series to prevent users from rooting the device or installing custom binaries using TWRP custom recovery. So, before starting the tutorial, please read all the details below.
Root Galaxy S10 details
Samsung uses the A-only system-as-root setup on their latest devices. The bootloader does not load anything, but the Kernel string does. This ensures that it uses the system as a root directory. In order to deal with it, the developer has decided to install Magisk directly to the recovery partition. But it got some complications. To fix this, the developer made Magisk detect the pressed button key when the phone boots. Since the recovery, as well as Magisk, co-exist in the same partition, you have the option to boot any one of them.
What is Magisk?
Magisk is a systemless root solution for the latest Android versions. It works by patching the boot image and other related files while not touching the main system file. Magisk is reliable and supported on a wide range of devices. The installation of Magisk is much clear, and it’s straightforward to uninstall too. In addition to giving root access, Magisk also offers many features that SuperSU does not. It has inbuild Magisk Manager that let you install various modules to customize your device (just like Xposed Framework).
Galaxy S10 USB Driver
Make sure you have correctly installed Galaxy S10 USB Driver on your computer. If not, please download from the link given below and install it correctly. Otherwise, your computer won’t detect your device.
Backup your Android Device
Before proceeding to the tutorial to install, we strongly recommend you to backup your important data and files from your phone. Because flashing an official firmware will erase everything from your device. We don’t want you to lose anything by following our tutorial. In that case, you can check out our list of backup app that may help you:
Samsung users can use Samsung Smart Switch to backup data on the computer. Samsung Smart Switch even allows the users to move data from one device to another of different variant (like moving data of Galaxy S9 to Galaxy S10).
You might be interested in the following articles as well:
- The ONLY TOP 6 Android data recovery software you should try!
- EaseUS MobiSaver for Android review: WORTH buying?
Once you are sure that you made a complete backup of your necessary documents, you can move ahead to the tutorial below and root Galaxy S10 using systemless root solution.
Unlock Bootloader on Galaxy S10 / S10 Plus / S10e
Before proceeding to the actual rooting process, you must unlock the bootloader of your phone. Once your device’s bootloader is unlocked, you can flash any custom files using recovery. The Galaxy S10 series got a new lock, and Samsung may implement this locking system on all the device coming with One UI.
Here’s the procedure to unlock the bootloader of Galaxy S10 series:
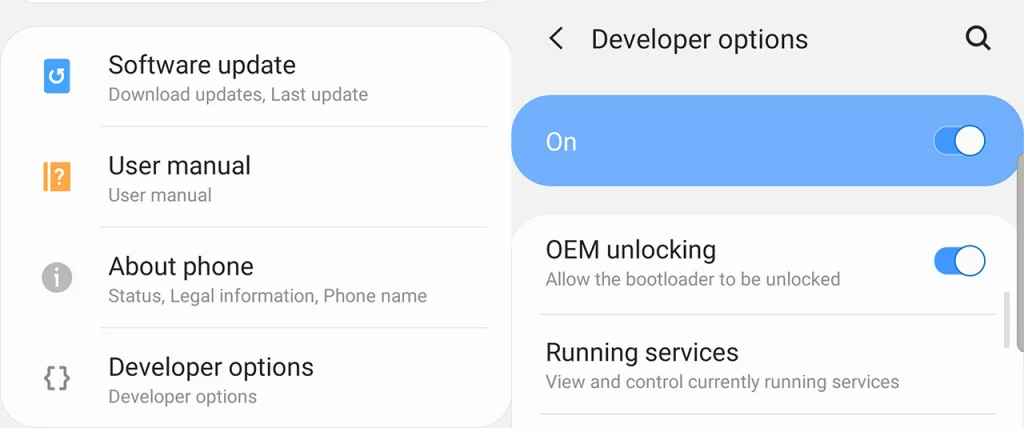
- Allow Bootloader Unlocking on your phone: Go to Settings > About phone > ‘Software information’ on your Galaxy S10.
- Now, Navigate to Build number > Tap it 7 times to become developer; Settings > Developer Options > OEM Unlocking.)
- Switch OFF your phone.
- Press and hold Bixby + Volume Down button and connect your device to the PC to boot into download mode.
- Long press on the Volume Up button to unlock the bootloader of Galaxy S10 / S10+ / S10e.
- Your data will be WIPED, and the device will get reboot automatically.
- Go through the initial process, and skip everything as your data will get erased again while installing Magisk.
- Again, repeat the process from Step 1 to Step 2 and enable OEM unlocking.
That’s all for Unlocking the bootloader on galaxy S10, S10+ and S10e. Once you are done, follow the tutorial below to root Galaxy S10 using Magisk utility.
WARNING: All the custom ROMs, Official Firmware, How-to guides, tutorials, roots, hacks, and tricks mentioned on our site belong to the respective developers. We are not responsible if anything goes wrong with your device. Perform it at your own risk.
HOW TO: Root Galaxy S10 / S10+ / S10e on Official Firmware
- Download the Official Firmware of Galaxy S10 from any one of the following sources:
(Make sure to download the correct version based on your device variant).
SamMobile SamFrew SM-G973F (S10) SM-G973F (S10) SM-G975F (S10+) SM-G975F (S10+) SM-G970F (S10e) SM-G970F (S10e) - The downloaded firmware should be in ZIP format. Do extract it on your PC.
- Copy the AP file from the extracted folder which should be named similar to AP_[device_model_sw_ver].tar.md5 (depending on the device model) to your phone.
- Now, download and install Canary Magisk Manager app from the link given below:
→ [DOWNLOAD] MagiskManager-Canary-19003.apk - Open the Magisk Manager application and tap on the Install button.
- Then, tap on Select a Patch File.
- Browse the AP file that you had copied in Step #3.
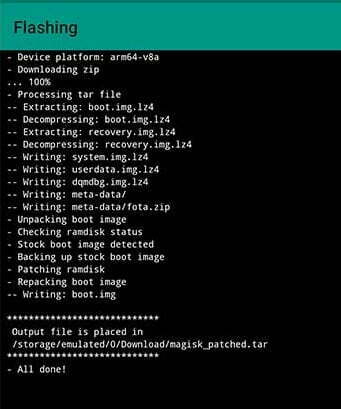
- One the patching is complete, there will be a file placed on your phone in the following location:
[Internal Storage]/Download/magisk_patched.tar
- Find it out and copy the .tar file to your computer.
- Now, Download the latest Odin flash tool on your computer from here.
- Boot your Galaxy S10 into Download mode:
Press and hold Bixby + Volume Down button and connect your device to the PC to boot into download mode.
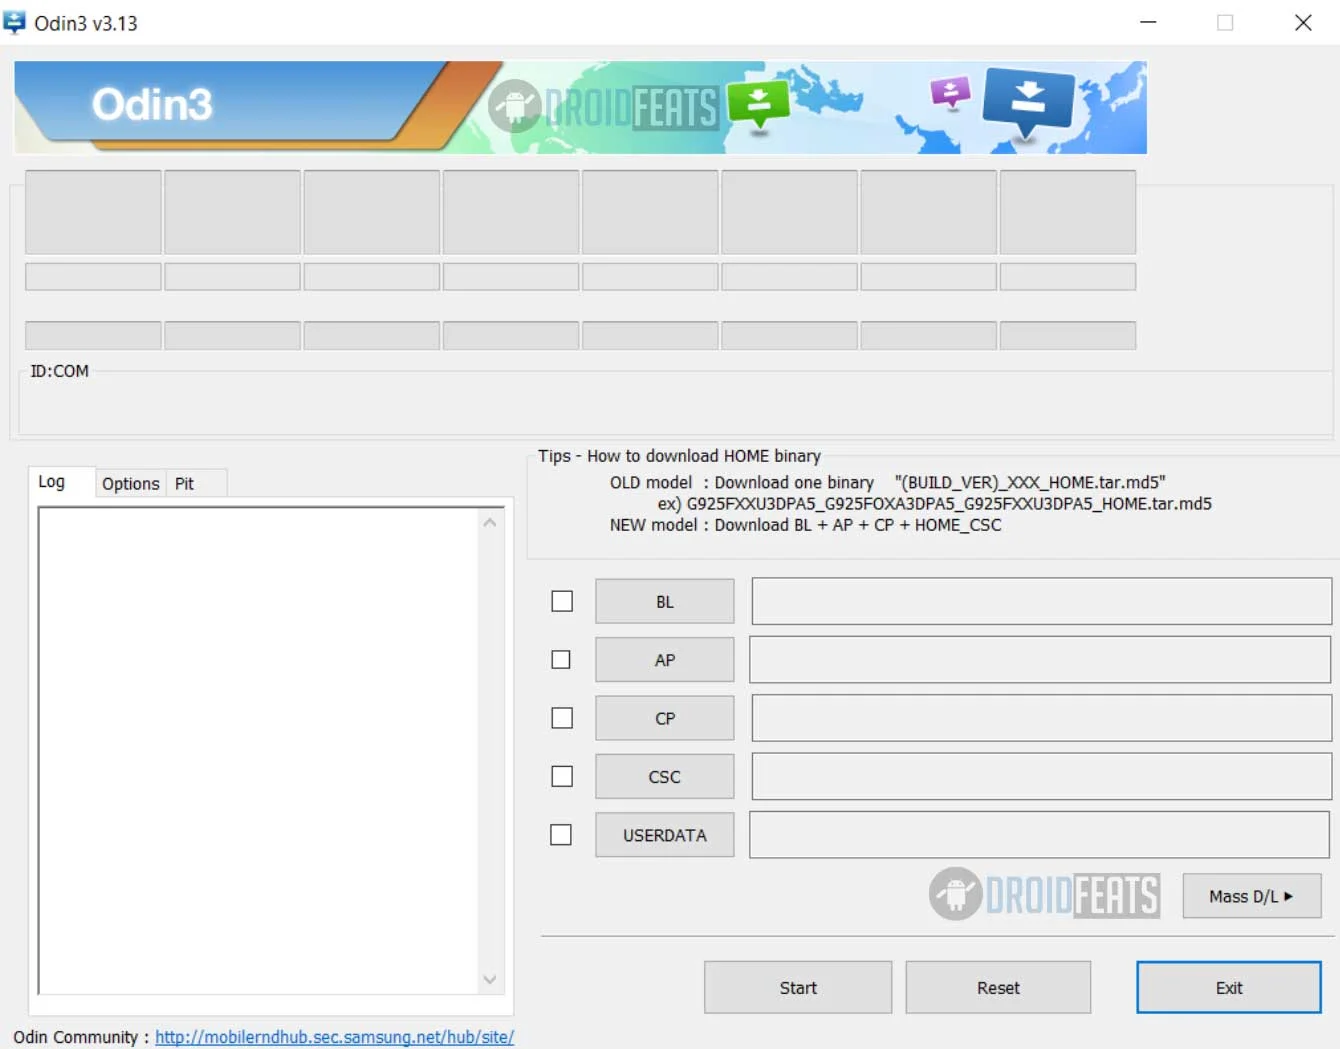
- One you are in Download Mode, open the Odin application on your computer.
- Tap on the AP option in Odin and select the magisk_patched.tar file.
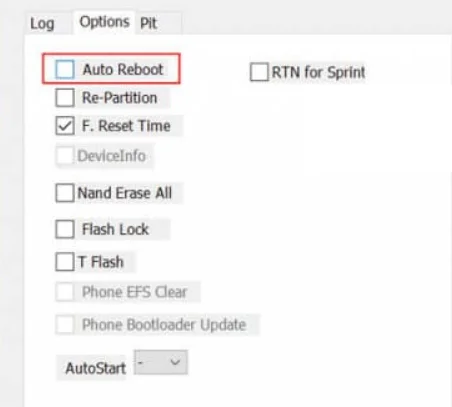
- Make sure to uncheck Auto-Reboot from the Options tab.
- Once Odin completes the flashing process, hold the following buttons to exit Download mode:
Power + Volume Down
- As soon as the screen turns off, press and hold the Power, Volume Up and Bixby button. This will take you to the recovery mode.
- In the recovery mode, use Volume buttons to navigate and Power button to select.
- From the list, select Wipe Data / Factory reset and then confirm.
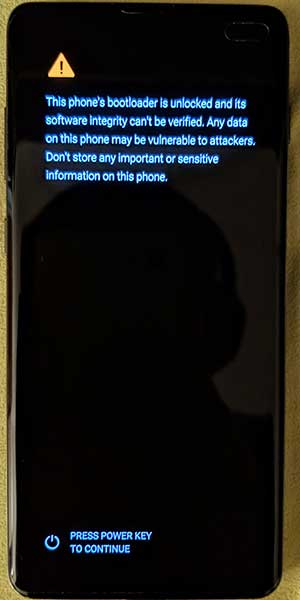
- Now, select “Reboot system now” and immediately hold the Bixby, Power, and Volume Up buttons together until the Bootloader Warning screen appears.
- As soon as the bootloader screen appears, release all the buttons to boot your Galaxy S10 / S10+ / S10e into a rooted OS.
That’s it! You are done!
Now, follow the on-screen instructions for the initial setup of your device, and then open the app drawer and launch the Magisk Manager app.
The Manager app will perform all the necessary procedure to set up things. When done, your Galaxy S10 will get reboot automatically.
Congratulation! You had successfully rooted your Galaxy S10 / S10 Plus / S10e using Magisk Systemless root utility.
Do share this article on SOCIAL MEDIA if you find it helpful to you.
Cool stuffs for Rooted Galaxy S10
You can now try some of the best Android rooting apps on your Galaxy S10. Make sure to grant root access to them and enjoy the features. If interested in Theming, do try out Substratum Theme Engine that lets you customize the skin of your device thoroughly.
Some more cool stuff for Galaxy S10:
- Download Google Camera for Galaxy S10, S10+, and S10e [latest version]
- Xposed Framework Hub [Download and install]
- How to: Install Magisk Modules using Magisk Manager app
- Download YouTube Vanced {latest} [ROOT] | [Non-ROOT] – for all devices
How to: Boot your system into recovery, Rooted OS, and Unrooted OS
As we mentioned earlier, Magisk and recovery will co-exist in the same partition. So, here are the steps on how to boot your Galaxy S10 (when powered off):
Unrooted System
Only Power button
Only holding the power button will take you to the untouched OS on your Galaxy S10.
Rooted System with Magisk
Press and hold the following buttons together:
Power + Bixby + Volume Up buttons
Release all the buttons once you see the bootloader warning screen to boot your Samsung Galaxy S10 / S10+ / S10e into Magisk rooted OS.
Stock Recovery
Press and hold the following button together:
Power + Bixby + Volume Up buttons
When you see the bootloader warning screen, release the Power and Bixby buttons and keep holding the Volume Up button. This process will take you to the stock recovery on your Galaxy S10.
Conclusion
So, this was a detailed tutorial on how to root Galaxy S10 on Official Firmware. I hope this guide is helpful to you. Again, don’t forget to SHARE this post on Social Media to thank us. More cool stuff for Galaxy S10 is coming soon. So, Subscribe to our email newsletter and stay tuned. Thank you!


